This article has been updated to reflect the enhancements that will be available after Friday 12 June as part of the June 2026 Release.
You can add and allocate assignments to participants, add elements to a cover sheet (FLOWassign and FLOWhandin only) or attach supporting materials or descriptions to a flow. Authors can also add assignments to flows if they have been associated with the relevant flow.
In this article:
- Add Assignment to a FLOWmulti
- Add Assignment on all other Flow Types
- Add Other Material and Flow Description
- Manage Cover Sheets and Add Elements
There are two ways how assignments on a flow can be added or accessed:

- Manage assignments: This option will send you directly to a new page where you can manage your assignment(s). Review the information below for the options available on the different flow types.
 : If no assignment has been added to a flow yet, you will be able to add the (first) assignment by clicking on this button. If an assignment has been added to your flow, this button will be replaced and the added assignment(s) will be displayed instead. Review the information below for the options available in the different flow types.
On FLOWoral you can also determine the point in time when the assignment should be handed out to participants.

Add Assignments to a FLOWmulti
You can add assignments that have been published by an author from your institution through a unique reference code. You can also associate authors with the flow and let them add the assignment themselves, but only when one single assignment is being added.
Associated authors cannot add multiple assignments, and assessors are not permitted to upload assignments when the multiple assignments feature has been enabled.
Individual Assignments on a FLOWmulti

- The setting for adding an individual assignment is always the default on a FLOWmulti. Click the cog icon to switch to the multiple assignments functionality.
- Enter the flow reference number from the assignment accessed via the authoring tab.
Once an assignment is attached to the flow, you will see the name and flow version of the assignment from either the To be handed out tab or when you access the Manage assignments sub-page.

- Preview the assignment as it will be displayed to participants.
- Download a PDF version with or without validation.
- View the assignment details. If a rescore needs to be performed, click here and refer to the information in the article Rescoring Submissions Based on Author Changes to Scoring or Validation.
- As long as the participation period has not started, it will be possible to delete the assignment and add another one.
An assignment needs to be added to the flow before the start of the participation period. Otherwise, participants will not be able to start the flow and see the following message:

- On a FLOWmulti, when the Individual assignment setting is used, the assignment is automatically allocated to all participants. It is not possible to do an individual allocation and these buttons are greyed-out.
Multiple Assignments on a FLOWmulti
Up to 20 unique assignments can be added to a FLOWmulti by the manager. These assignments can then be distributed to participants either manually or using familiar allocation tools such as Quick Allocation and the Allocation Matrix.
The multiple assignments setting must be enabled on your licence. Please reach out to UNIwise to find out more.
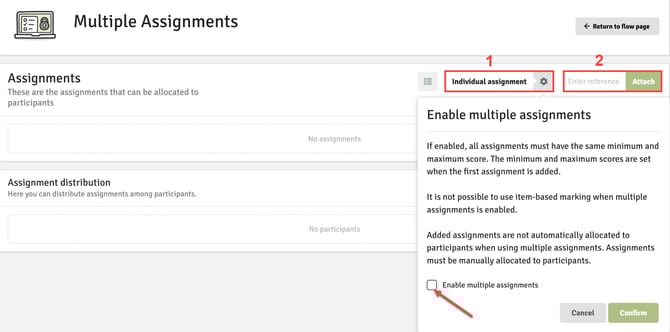
- Click on the cog icon alongside the Individual assignment setting. Tick the checkbox Enable multiple assignments and then Confirm.
- Enter the reference numbers of the assignment flow versions you wish to add.
All assignments must have the same minimum and maximum score. The minimum and maximum scores are set when the first assignment is added.
It is not possible to use item-based marking or the legacy marking tool when multiple assignments is enabled.
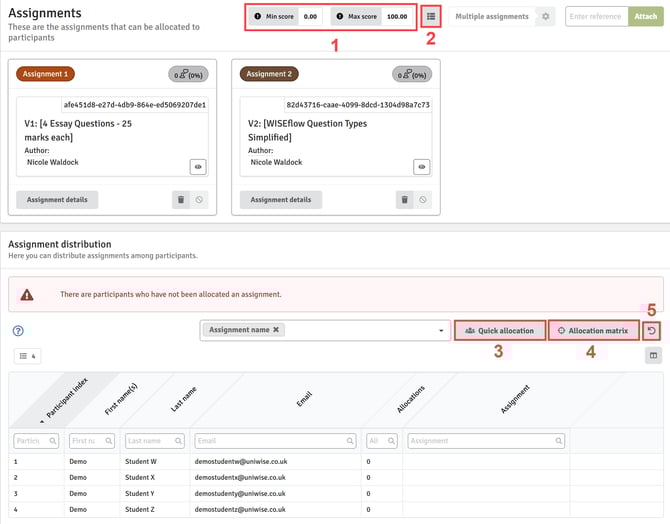
- The minimum and maximum score are defined by the first assignment that is uploaded.
- Toggle the assignment display as a table.
- Use the Quick allocation button to randomly assign assignments to participants in bulk (see below).
- Alternatively, use the Allocation matrix to assign specific assignments to the correct participants (see below).
- Reset the allocation and start again.
Quick Allocation

Allocation Matrix
When using the multiple assignment functionality, assignments must be allocated to participants.
Add Assignment on all other Flow Types (FLOWassign/-attend/-handin/-lock/-oral)
On these flow types, it is possible to add one or several assignments and allocated them to different participants or groups.
Manage Assignments
When you open the assignments page, you will have the following options:

 Download all of the assignments in a single zip file.
 Change how the page displays the assignment: either as a card view (see above) or a list view.
- Create a new assignment. When creating or editing an assignment, you will get a few options to tailor your assignment. The Allocated to all button will be turned on by default. You also have the option to either drag & drop your material into the two fields or to browse for files that you want to upload.
Appendices are not available on a FLOWlock flow.

- View all of the relevant information of a single assignment.
- Edit the assignments, their different properties and their appendix material. When pressing the Edit button, you will be able to change the assignments materials and properties.

- You can change the name of the assignment for easier differentiation between assignments. The chosen name will also be displayed to participants.
- Allocate the assignment to all participants on the flow. See the information on Allocate Assignments below for individualised allocation options.
- If the file format is recognisable by WISEflow, the type will be shown here with an icon, the name of the material is displayed next to it.
- Remove, preview or download the material.
- Delete the assignment completely, if you want to remove the assignment completely from the flow.
Assignments can be removed during the participation period. If changes are made to assignments during the participation period, participants need to refresh the lockdown browser (for FLOWlock) for changes to come into effect.
 If the material added as an assignment or appendix is viewable in browsers, it will have an eye next to it that lets you preview it.
- Either remove
 the assignment from or allocate
  it to all participants.
Allocate Assignments
After creating and editing your assignments you can allocate different assignments to different participants if necessary. Allocating assignments can be used in many different scenarios: to give individual participants additional or special assignments, randomly allocate assignments to participants, etc. The assignment distribution can be found under the Assignments section as discussed above.

When looking at this table, you have a few different views to allocate assignments and change the table view:
-
Quick Allocation
Quick allocation lets you quickly distribute assignments based on percentages to randomly distribute assignments to students.
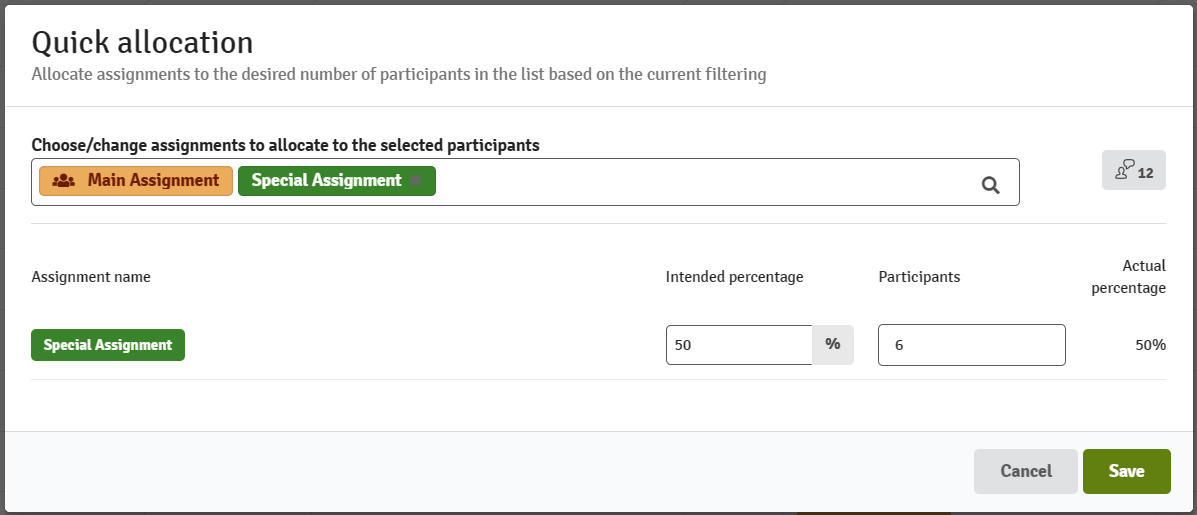
This type of allocation lets you allocate the assignments randomly to each student based on a percentage of how many should have the assignment allocated.
This works by first clicking the field at the top to add an assignment to be allocated. After choosing your assignments, you can start changing the percentages of how many should have the different assignments allocated.
Assignments marked as Allocated to all will be shown in orange in the field, as they are automatically added to 100% of the students.
You can choose to change either the Intended percentage or the Participants to whichever amount you want to have the assignment allocated to.
-
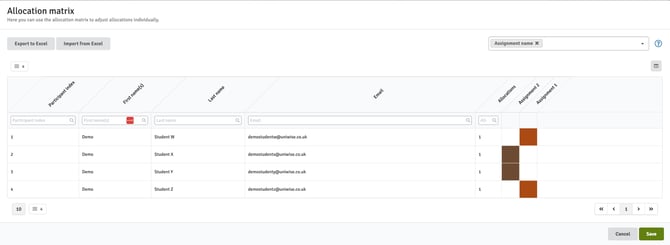
Allocation Matrix
This matrix is great for quickly allocating assignments to specific individuals.
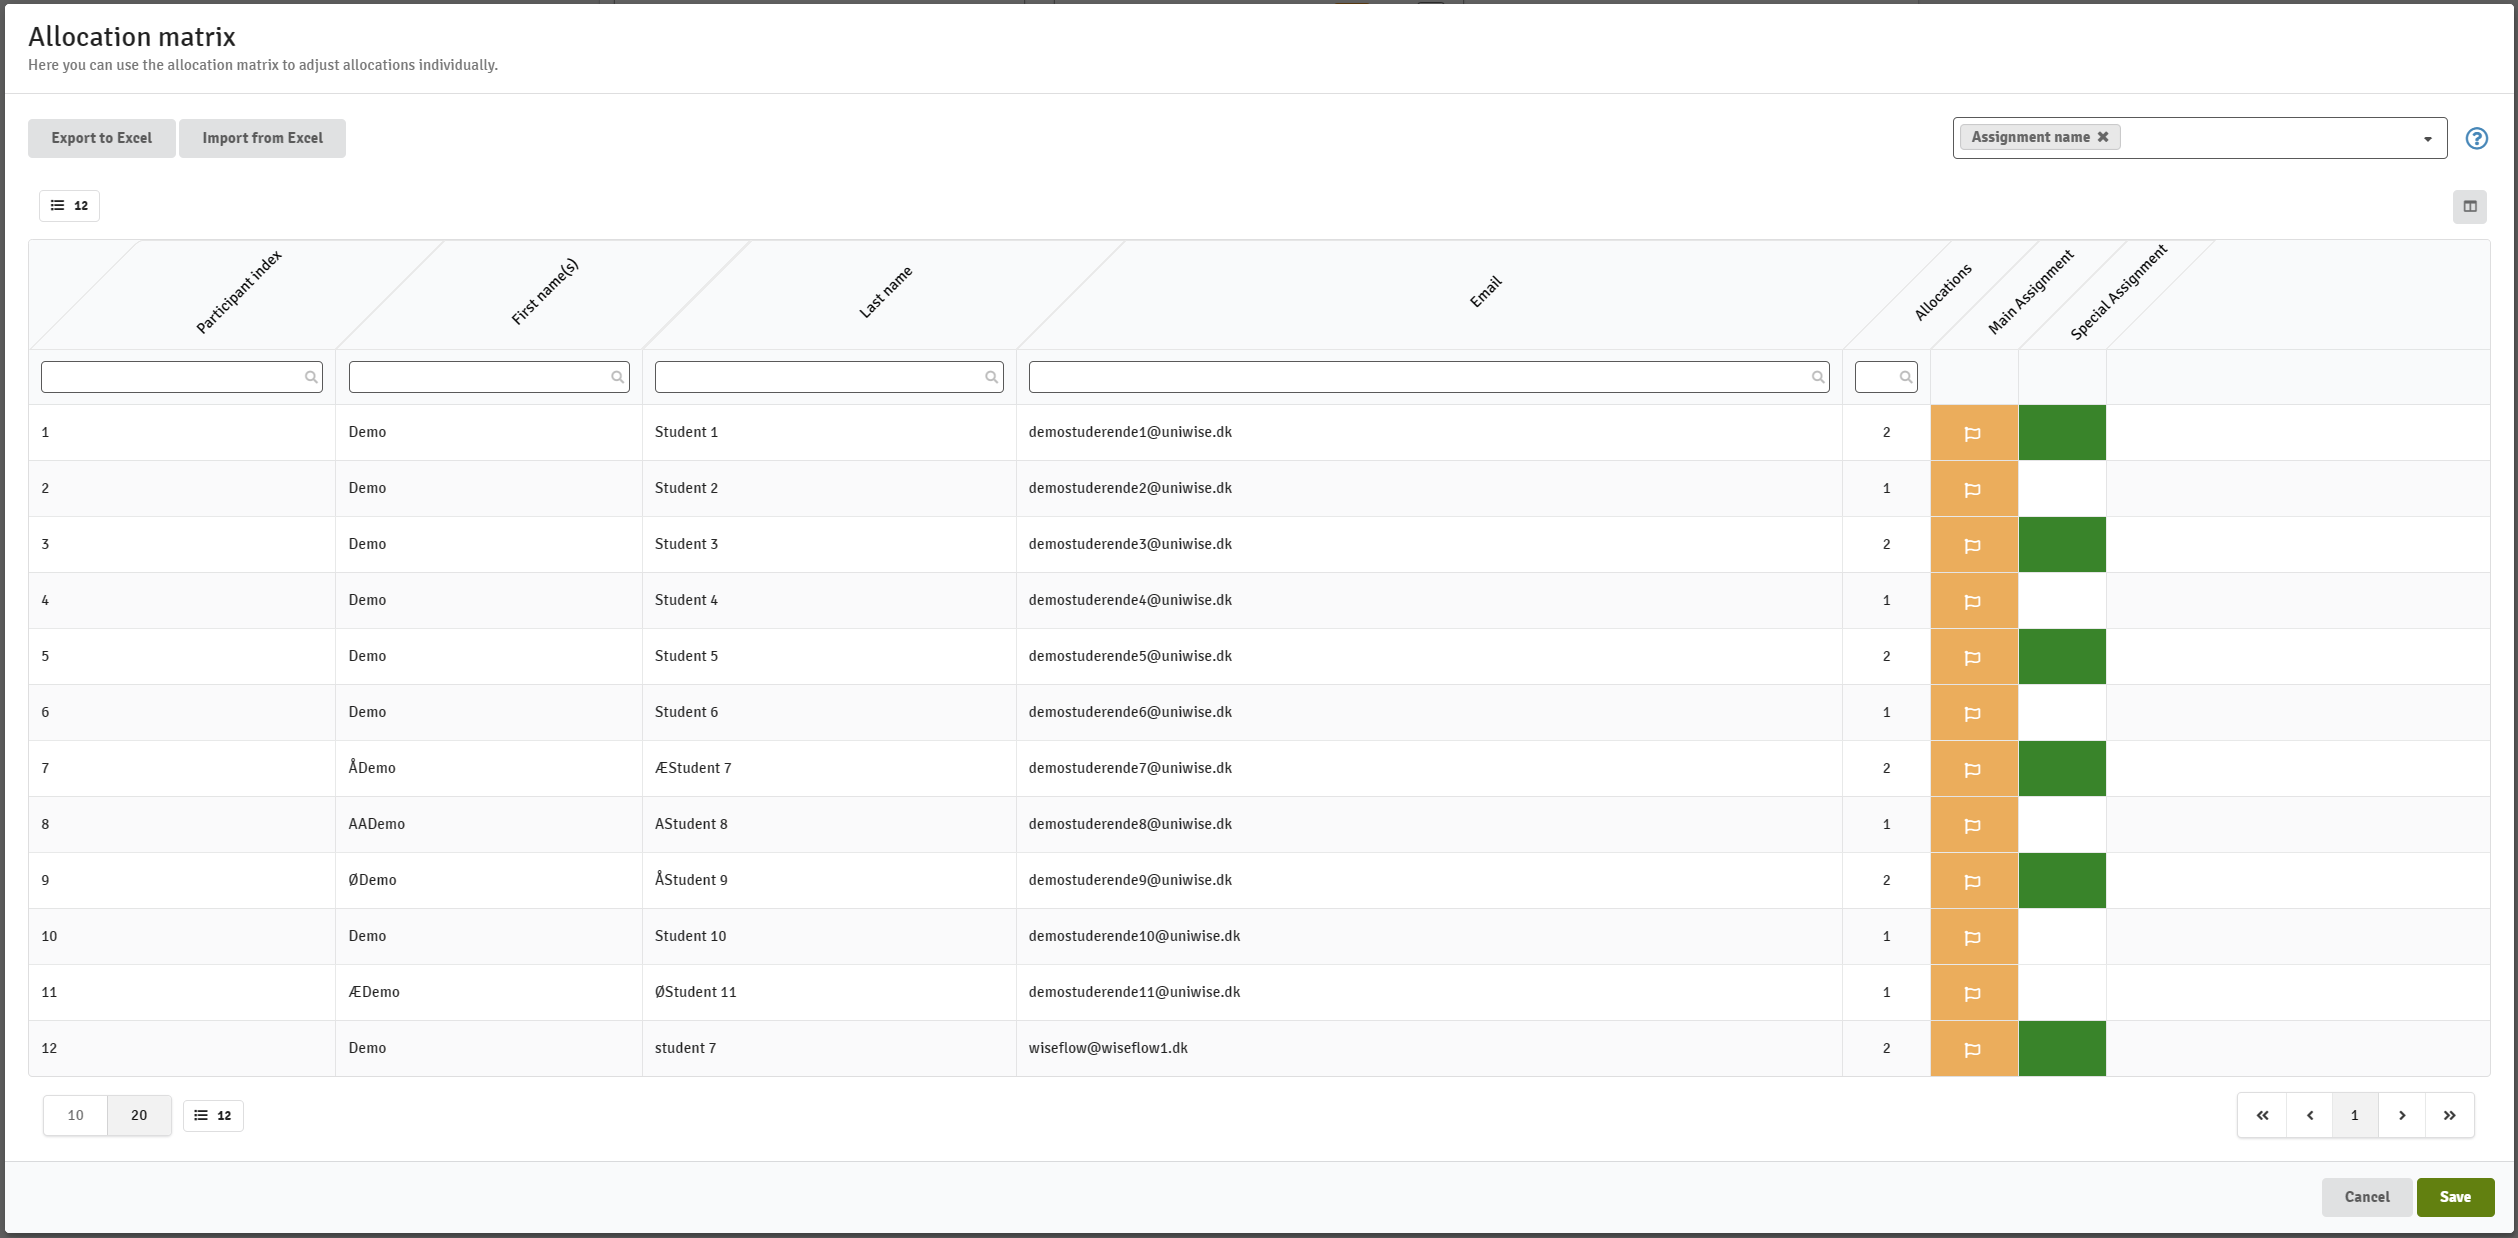
On the right side of the table, you will see squares that correlate to each assignment next to the student. By clicking the square you can allocate the assignment to this individual student.
For quickly allocating several assignments or students, hold down the A and D keys to Add or Delete an allocation of the assignments to the square you are holding your mouse over. This lets you add and remove assignment allocations by moving your mouse across the squares.
- Reset: This button gives you an option to reset your allocation, in case you want to redo your assignment allocation.
- Assignment identifiers: This field contains various options of how you want to display the assignments in the assignment column of your allocation table, such as assignment name, file name or appendix name.
- Table columns: By pressing this button you will get access to a variety of different columns you can choose to display in the table.
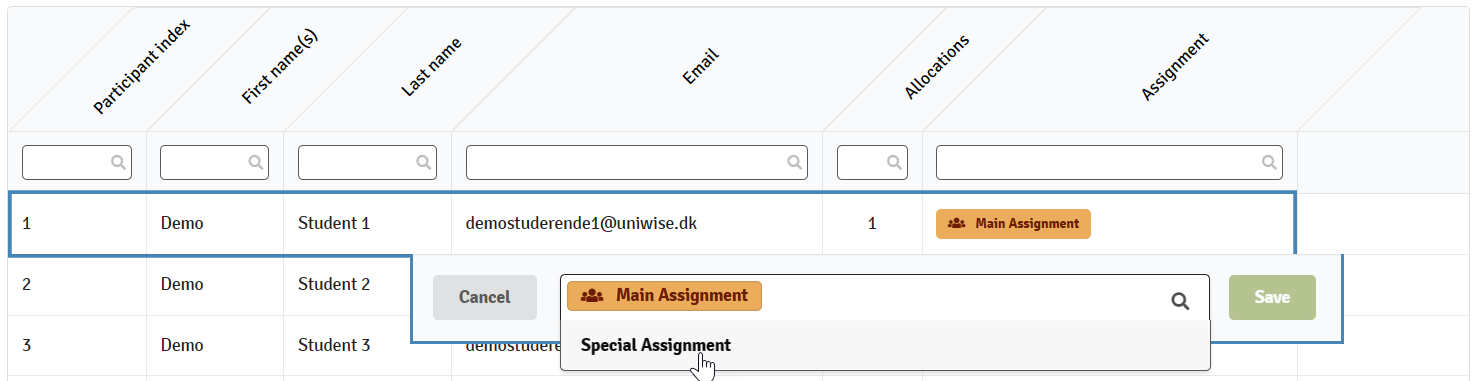
- Direct allocation: Assignments can also be directly assigned to a participant by clicking on the participant in the table. A field appears where you can choose which assignments to allocate to the participant.
Add Other Material and Flow Descriptions
Supporting Material
You can add files and/or links via the To be handed out tab.
You can provide participants, assessors and reviewers with Supporting material for all which becomes available when the flow is activated. Assessors and reviewers can access these materials on the flow landing page above the participant list.

You can also choose to supply Supporting materials for participants. They can see these materials on the flow page in a document viewer when the flow has been activated. File types that can added here are: pdf, docx, pptx, xlsx, png, jpg, and jpeg.

Supporting materials are available on the flow landing page and will not be accessible to participants while they are working in the lockdown browser.

You can also add an email address in the URL field by inserting mailto: follow by the email address of the relevant contact person. Users will be automatically led to their chosen email program when clicking on the link.

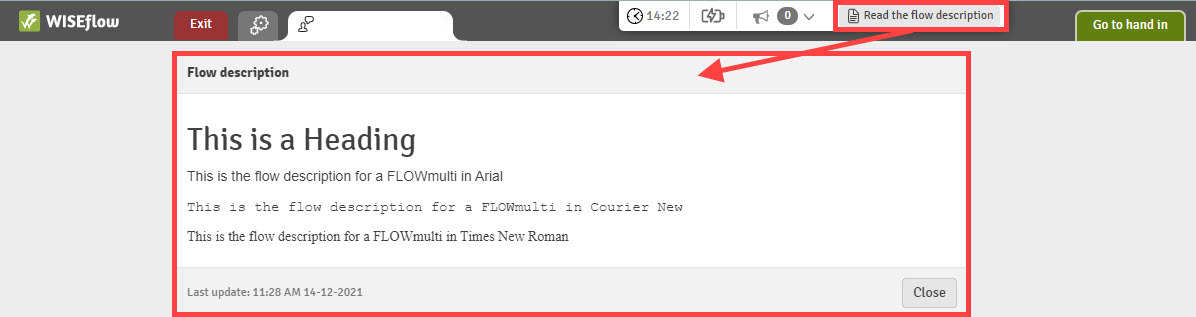
Flow Description
You can also opt to add a custom description to a flow which can be seen by participants when the flow is activated (on the flow page) and also when they are working within the lockdown browser:
The flow description can be managed from the To be handed out tab, under Supporting material for participants:

The extra benefit here is that you are able to prepend the description to the assignment PDF when zipping it as a manager and thereby making it easier to make backup paper copies with a proper flow reference and description.
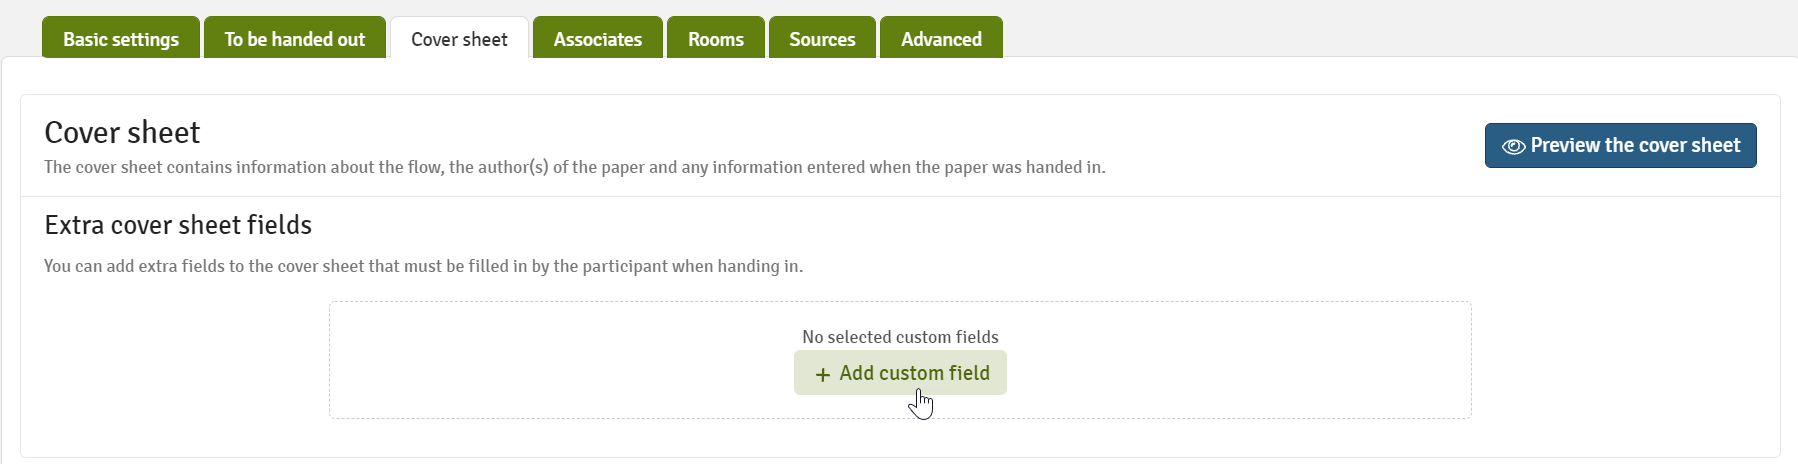
Manage Cover Sheets and Add Elements (FLOWassign & FLOWhandin only)
The cover sheet can contain elements that the participants need to fill out before submitting their work. You can specify the information that must be supplied by the participant and add elements for them to complete. The cover sheet can be found in the flow tab Cover Sheet.
You can add new fields by clicking on Add custom field.
You will then have the option to:
- Search for cover sheet fields that are available on your licence, by title or ID.
- Field ID for easy repeat identification.
- See what type of element it is (i.e. Input field, Checkbox, Drop-down menu, etc.).
- Mark often used elements as favourites for easy access on other flows.
- Add the element to the cover sheet.

Once you have selected cover sheet fields, you can arrange multiple elements in a particular order for the participants. Click Save to save the new order of the fields.

Click on Preview the cover sheet to see if all information is displayed correctly.
Please be aware that selecting the field: Does the submission contain confidential material? will send the participant submission to a similarity service such as Originality or Turnitin and a similarity report will be available. However, since it has been marked as confidential, the submission will not be saved in the database and prevent other submissions being analysed against it.
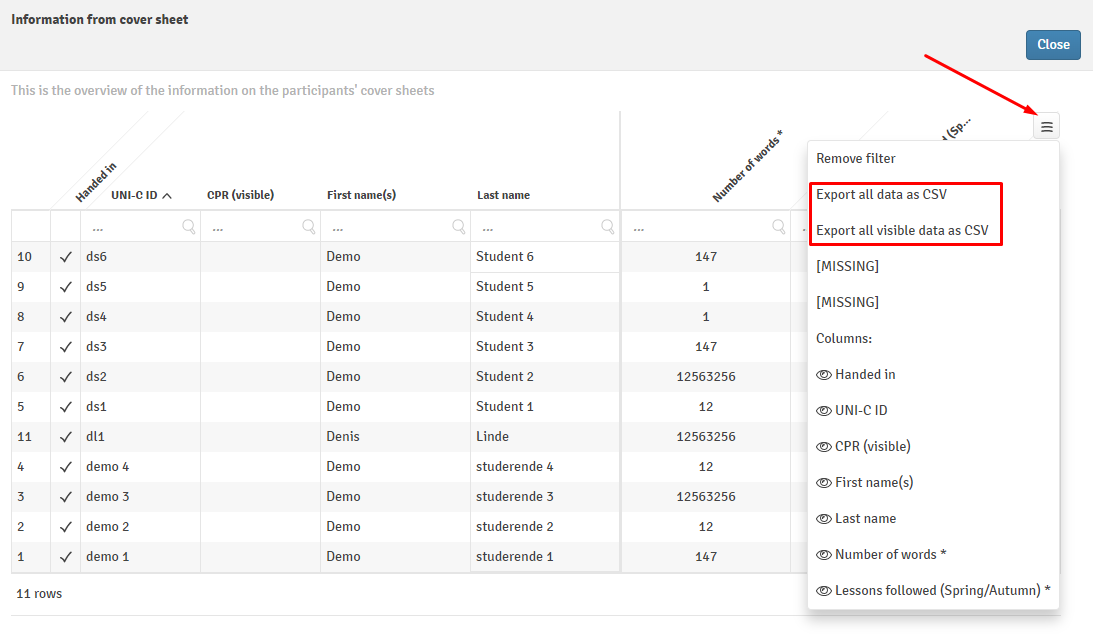
Review Participant Information from Cover Sheets

- Choose participant details and Show cover sheet. You can see information about a specific participant's cover sheet by choosing the participant details and clicking on

- Choose Tools and see a detailed list of cover sheet information for all participants who have submitted something (The list is only available if one or more cover sheet fields are added)
With the detailed overview, you can export cover sheet data to a CSV file. This is done by clicking the menu and choosing export with or without current filtration: