This article has been updated to reflect the enhancements that will be available after Friday 24 July as part of the July 2026 Release.
The question editor varies depending on the chosen question type, but the overall overlay is the same. The preview is fully interactive, so you can test out the current settings of your question. When you are happy with your question, click on the Save button above on the top right of the question and you will be redirected back to the item.
A maximum of 50 questions can be added to a single item.

1-11 Item Setup
- Displays the item title and description.
- Add or amend the author group(s) with whom you wish to collaborate on the item.
- Access the WISEflow Service Centre for support articles.
- Lists the assignments to which the item is associated.
- Duplicate the item.
- Delete the item.
- Edit the item title, description and labels.
- Save the item.
- Copy the question to the clipboard so that it can be inserted into an alternative item.
- Access the clipboard to insert a copied question into the item.
- Once a question is copied to the clipboard, use template functionality to save the question as a template. This can then be used repeatedly to insert a commonly used question into an item.
12 - Basic Settings
- Undo/Redo changes made to the question by clicking Undo or Redo.
- Change between editing and previewing mode.
Preview allows you to see the question as it will be shown to the participant during the exam. You will be able to test out the question, verifying the correct answers and scoring for that question as well as see the distractor rationale (where applicable).

13 - Question Editor
Question Text & Options
Formatting Options
 Question stem
 Options (MCQ as an example)
| |
|||
| Change text style | Change font size | Numbered or bullet list | Apply indentation |
| |
|
|
|
| Align text | Add link to text. Managers may still have to whitelist links for a FLOWmulti | Add image, LaTeX, table, block quote or insert special characters | Add audio or video player, calculator, protractor, ruler or line reader |
| |
|
|
|
|
Upload files and images as a hyperlink Accepted file types: gif, jpg, png, pdf, csv*, rtf*, dot*, doc*, docx*, xls*, xlsx*, odt*. |
Add ARIA label to text for better accessibility. Text with ARIA label will have a visual indicator for authors but will not be visible to participants. |
Add supplemental content (i.e. image and text) to text via a pop-up window. Text is limited to 250 characters and an image should not exceed 250x250 pixel (max. file size 512kb). |
Undo or redo changes |
| |
|
| Choose a formatting style | Edit question text in HTML |
Response Box for Cloze Questions
On cloze questions, you will also encounter this symbol  on the template field, which lets you add a response box to the template area.
Advanced Accessibility for MCQ
When authoring multiple-choice question types, it is possible to add custom ARIA labels to each answer option by clicking Show advanced accessibility options. You can additionally enable that visible content is navigable by a screen reader even if no custom ARIA label has been set. More information on the functionality can be found here.
Text Formatting Options
For questions, where participants should give a long text response (Essay, Math essay, Chemistry essay question types), you need to define the text formatting options that should be available to participants when composing their response. The text formatting options can be rearranged by dragging and dropping the icon by the three stripe line underneath the icon.
 |
|
 |
 |
|
Enabled per default Bold, Italic, Underline |
Enabled per default on essay questions Numbered or bullet list |
Enabled per default on essay questions Special characters |
Enabled per default on chemistry and math essay questions Apply indentation |
 |
 |
 |
|
|
Enabled per default on chemistry and math essay questions Formula editor |
Enabled per default on chemistry and math essay questions Undo or redo changes |
Clear formatting | Code inline and code editor |
|
|
|
 |
 |
| Text alignment | Block quote, superscript, subscript | Text direction |
Insert horizontal line or table |

 |
 |
 |
Word limit |
|
Insert an image |
Only available on essay question types Math characters |
Set a divider so that participants can easily recognise different text formatting options |
Set a word limit and determine when and how it should be visible. Decide if the word count should be shown to participants. |
Set Up Auto-Validation
If auto scoring has been enabled (on questions where this functionality is available), you can setup and edit the way questions are auto validated. To set this up, you have to choose which answers are correct and how much they score. Below the question text and options, go to the section Set correct answer(s).
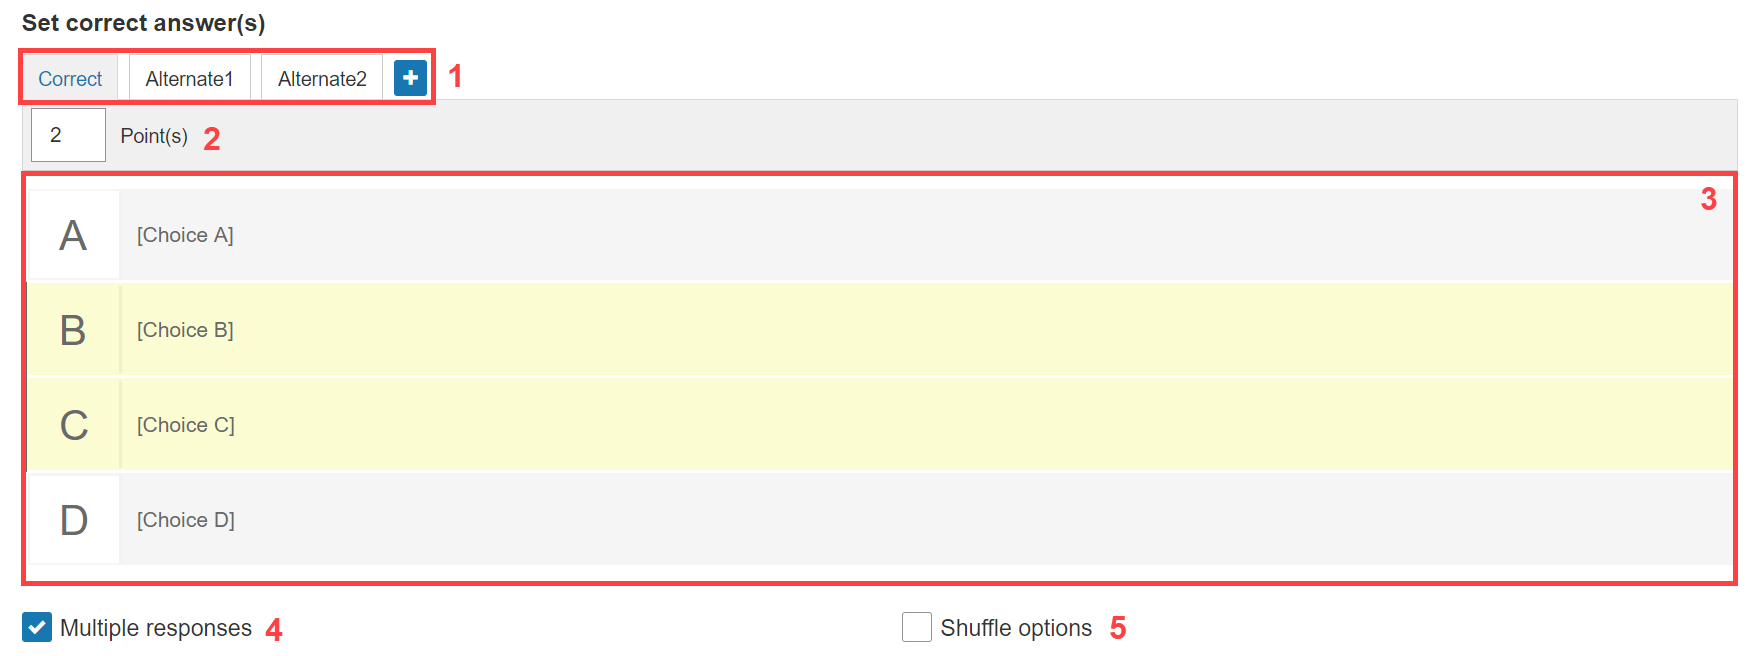
-
Auto validation schemas. As a default, the question has an unfilled Correct schema, but you can add alternative schemas, meaning that you can setup multiple answers that give different points.

Notice, that in the example above, the correct tab gives 2 points for choosing the two correct sections. The alternative tab gives one point for guessing just one of them.
- The score given by answering according to the chosen schema. Also refer to the scoring type mentioned below in More Options under Scoring.
- The schema. Click on sections to define them as correct answers. These will turn yellow.
- Enable if multiple responses can be given.
- Enabled if the answer options should be shuffled each time they are shown (in preview and for the participant).
Fill in Blanks questions have the extra option to Match all possible responses, which will let all possible answers be mixed and matched, to allow correct answers across all alternatives for each individual case in the question.
14 - More Options
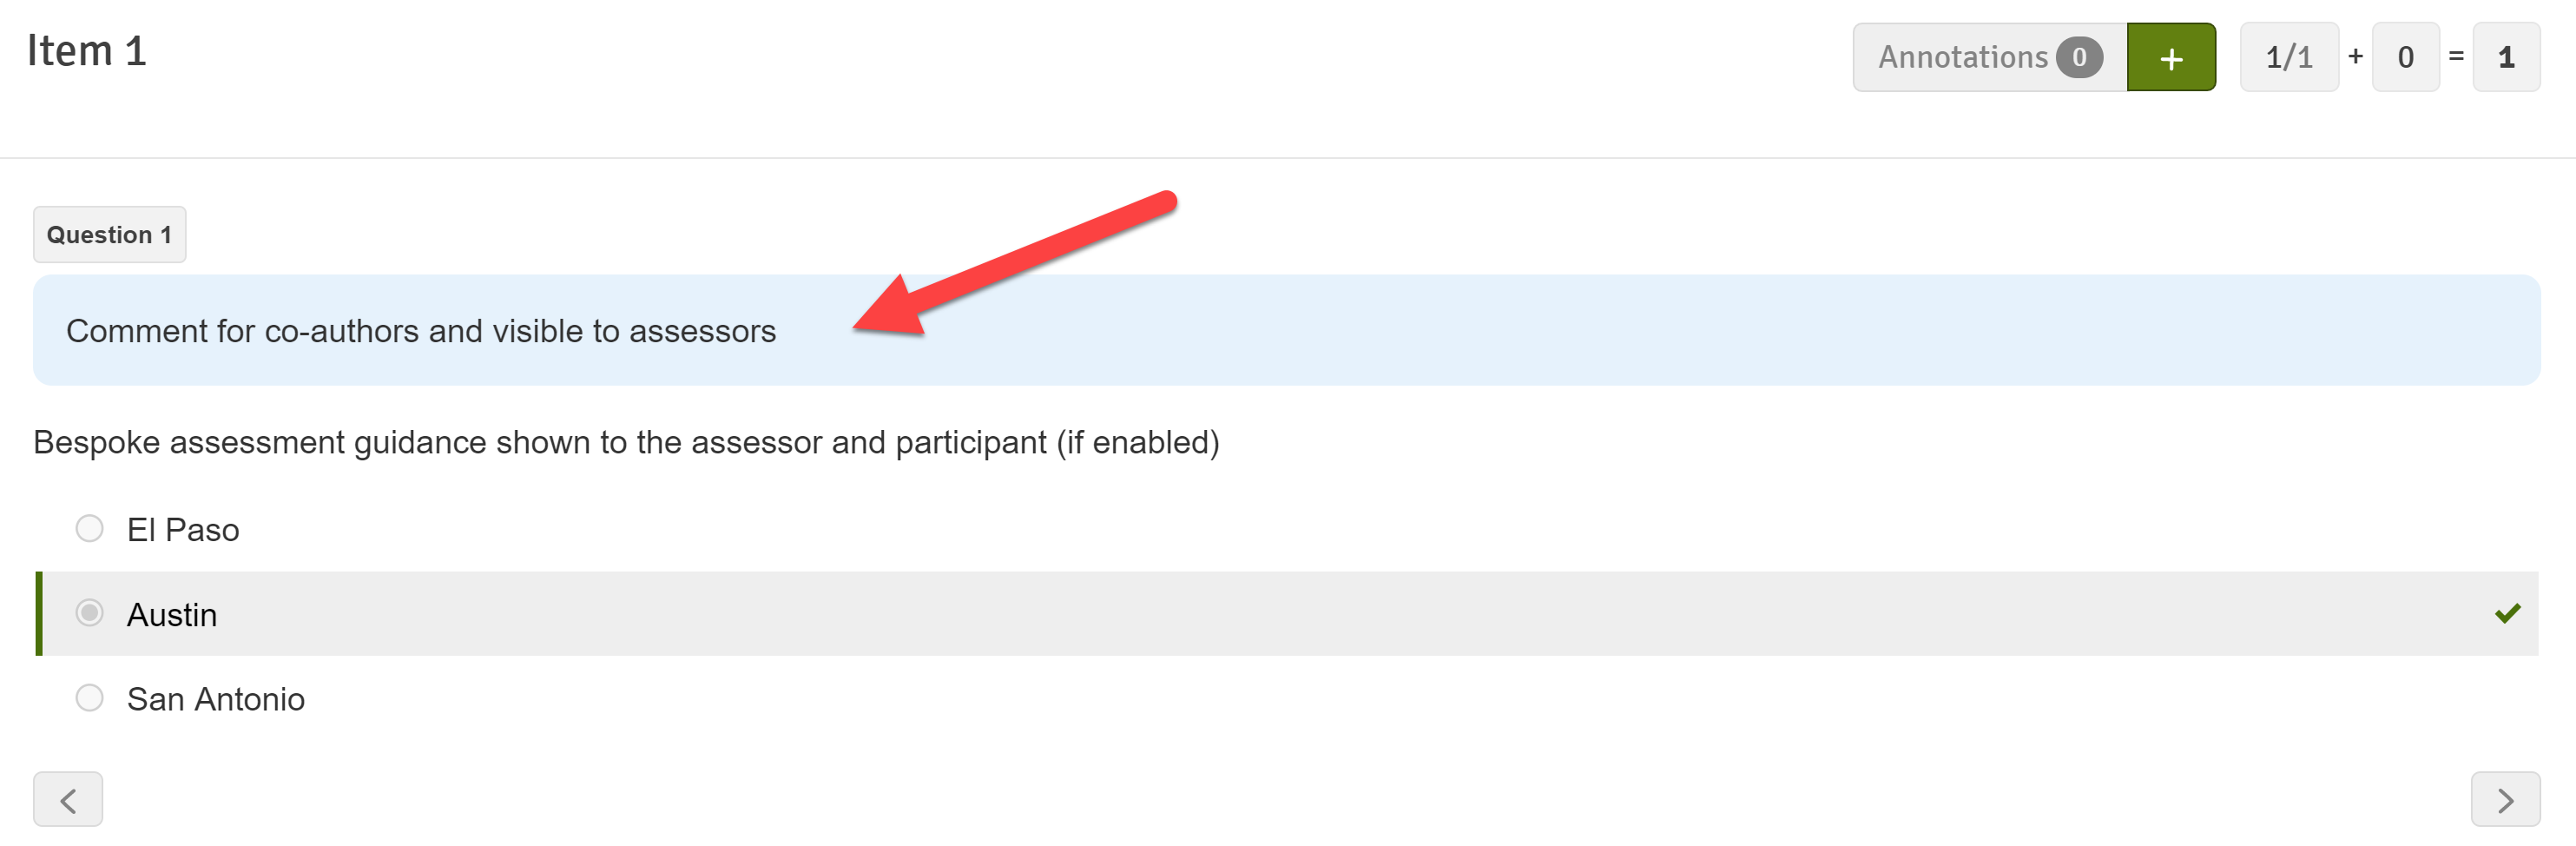
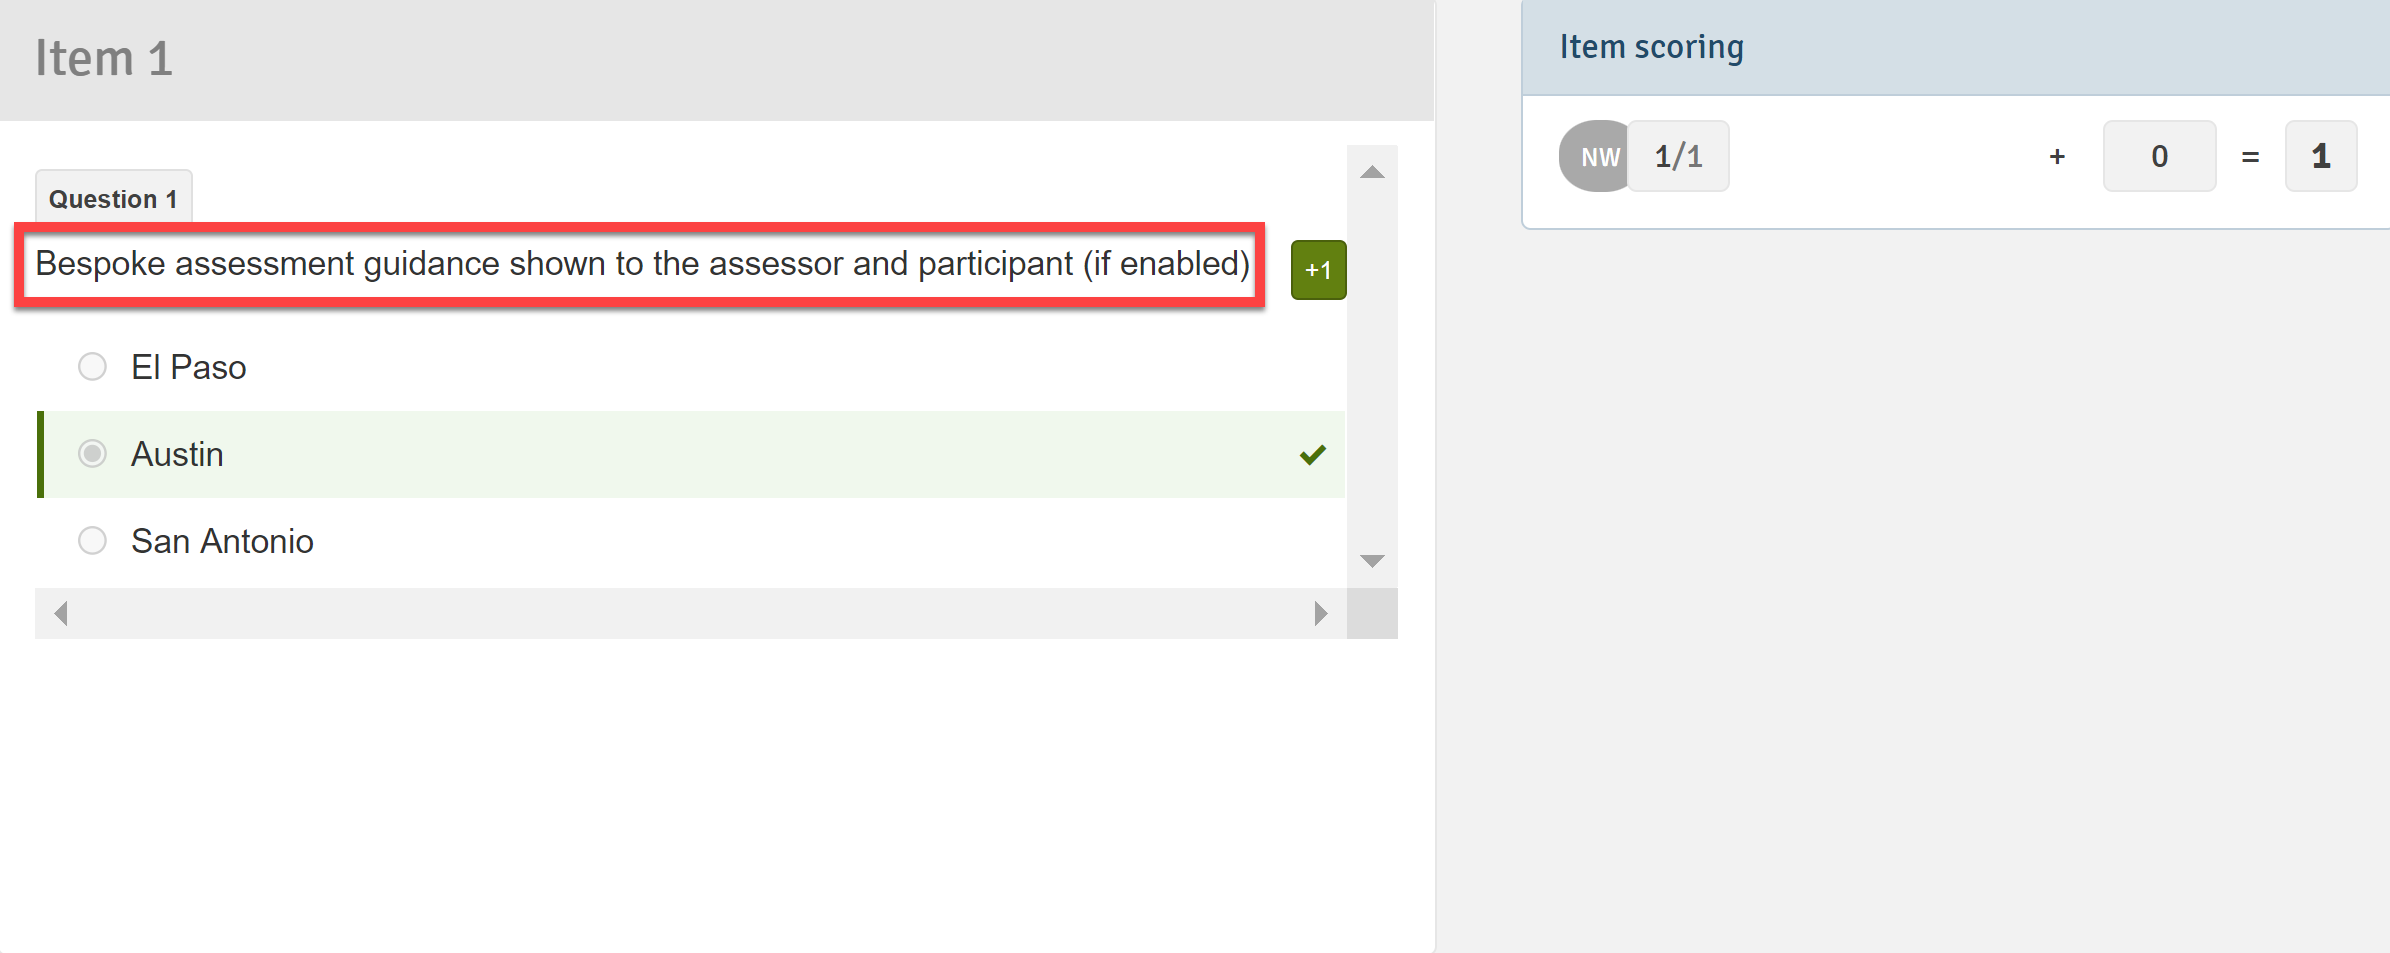
Add an Assessment Guide or a Comment for authors to the question. This is an easy way to convey information to assessors and authors that is not shown to participants.

- Assessment guide: Overrides the question text for the assessor during the assessment phase and post-assessment. This setting is mainly used as a tool to inform the assessor and participant of the reasoning behind automatic scoring. This additional information can be made available to the participant post-assessment. Further details on the participant view of the Assessment Guide can be found here.
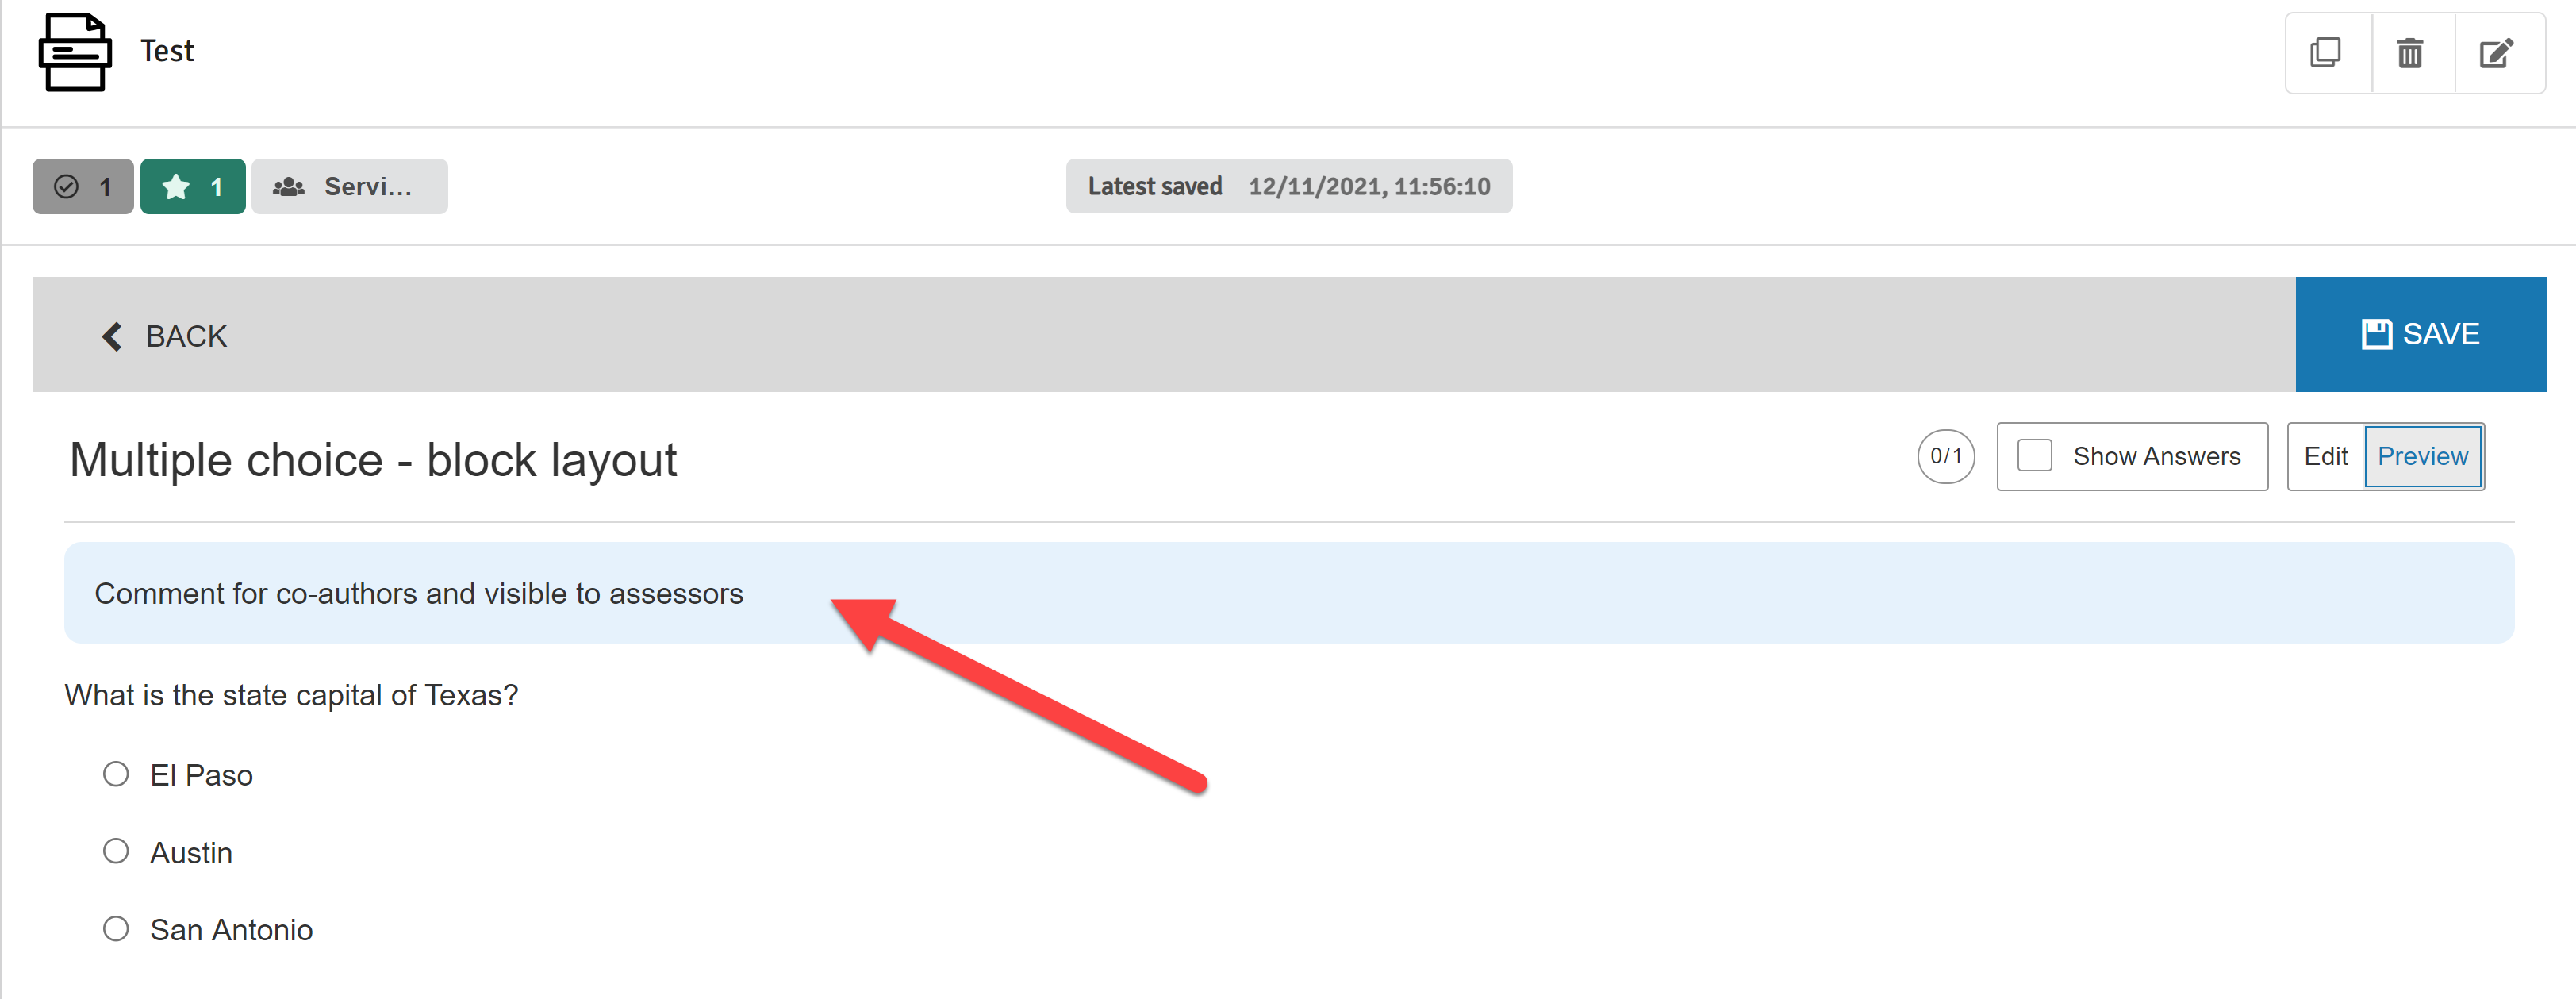
- Comment for authors: Adds a blue text box above the question text. This is shown in the question editor and during assessment to the assessor.
- If enabled, LaTeX or MathML content will be rendered in the question.
If the question text also needs to be visible, copy this into the Assessment Guide text field and write the custom description below it.
Text written in the Assessment Guidance (1) and Comment for authors (2) fields will show up according to specific roles and specific parts of WISEflow. Please see examples for details on where this text will be seen according to their role.

Author View
Assessor View

So too does the Comments for authors:
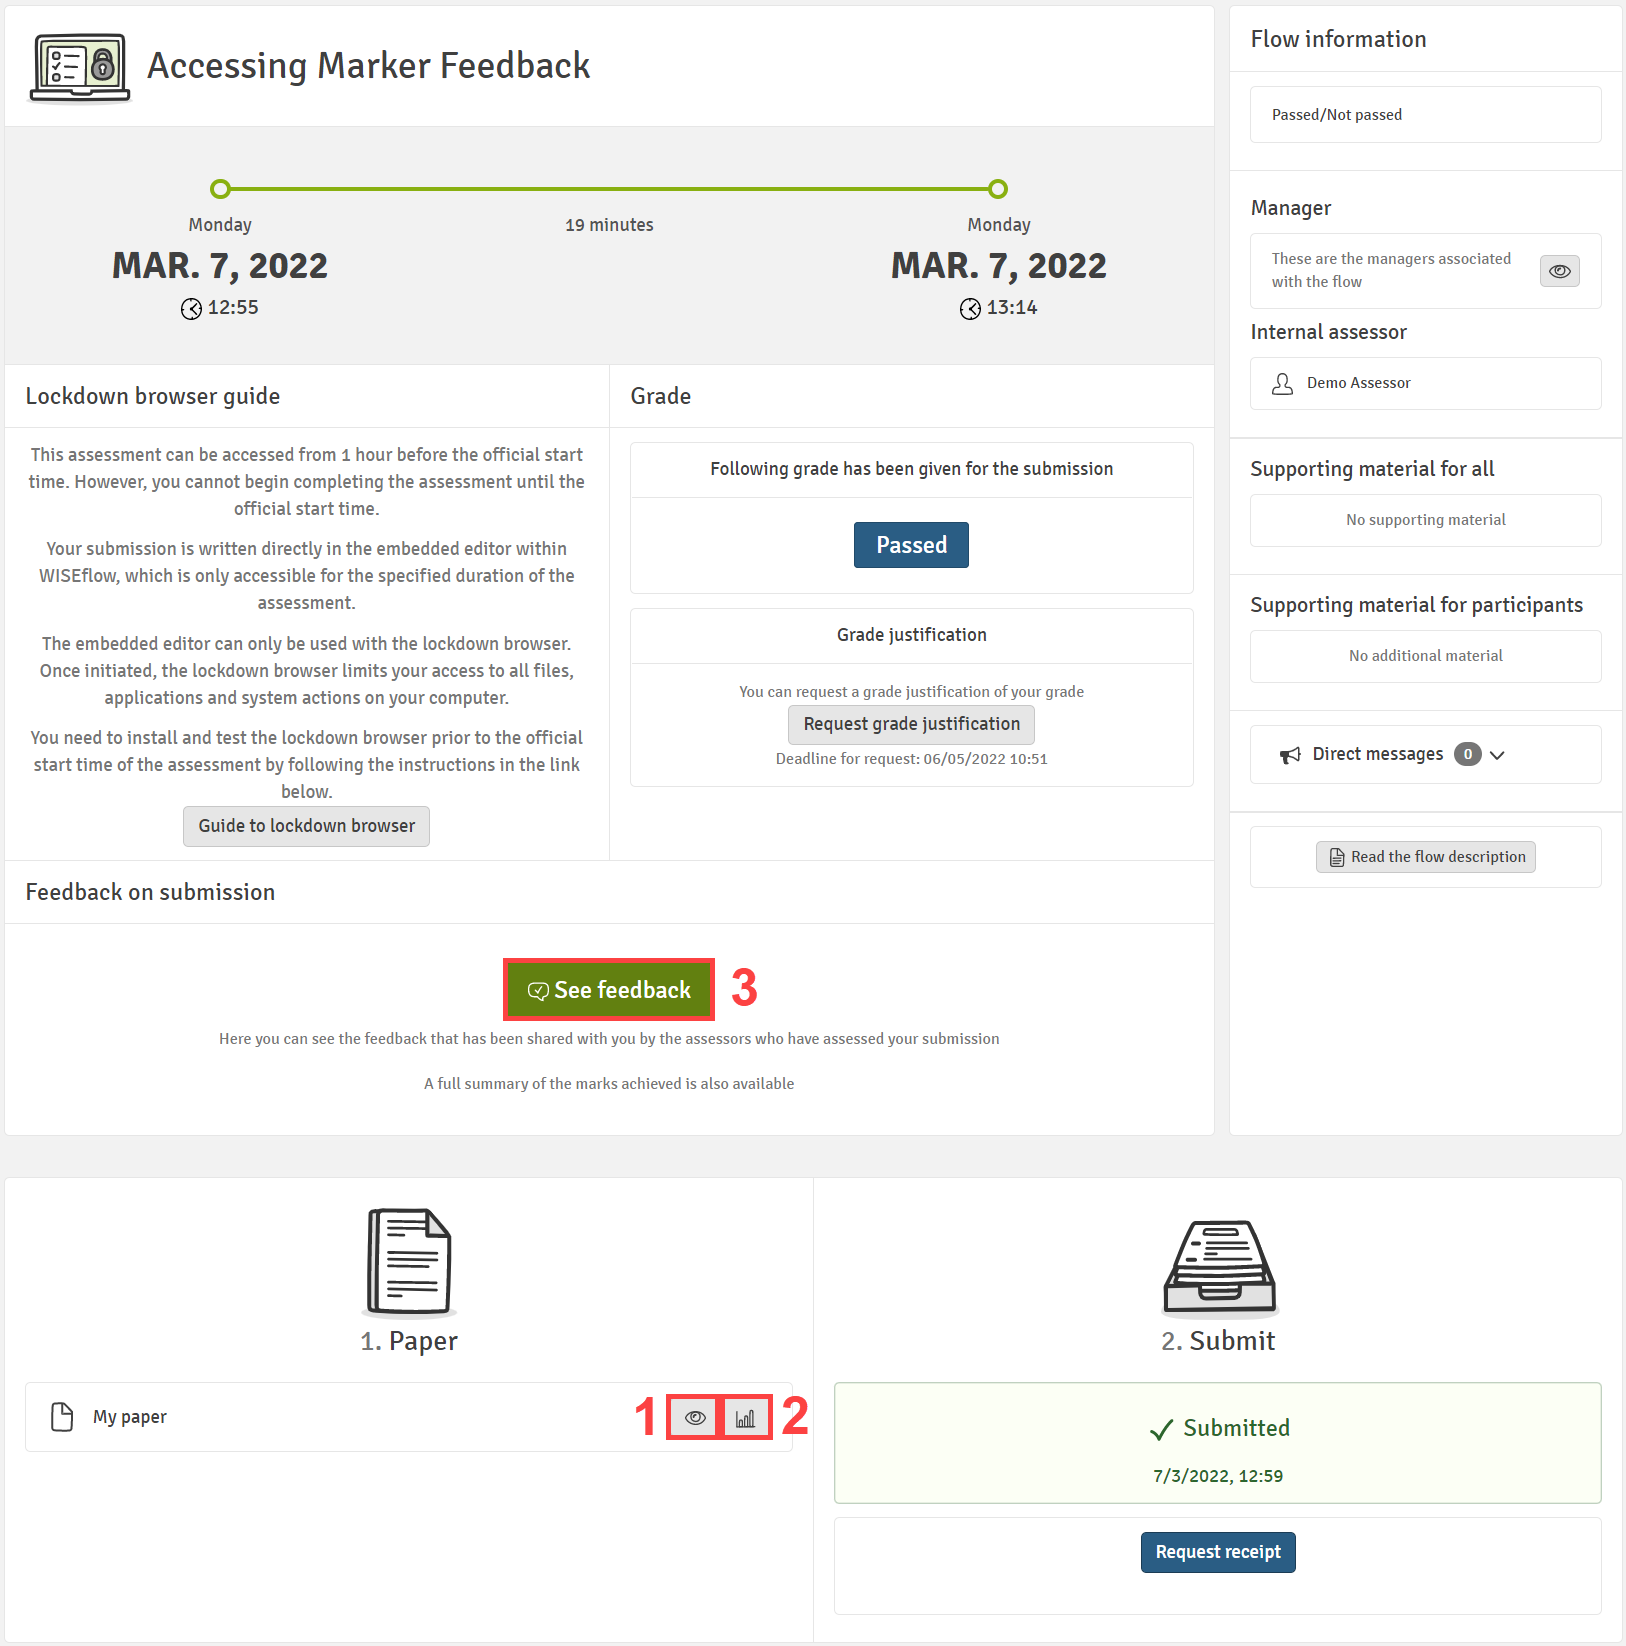
Participant View
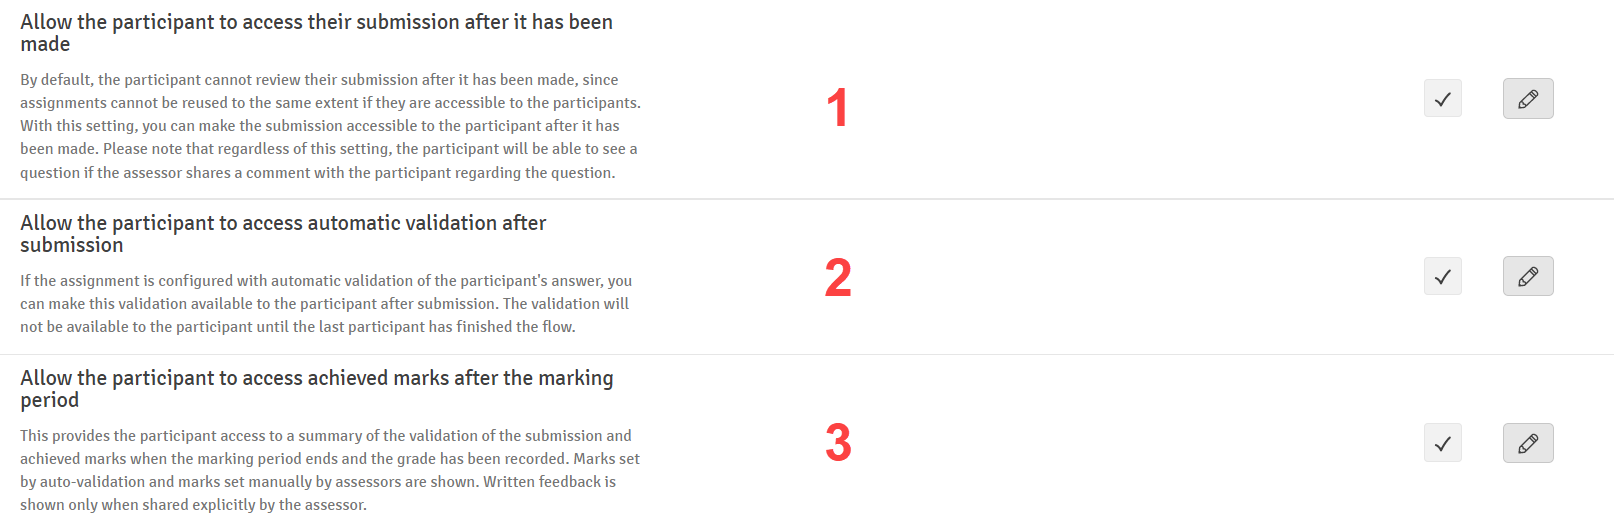
- Allow the participant to access the paper after submission.
- Allow the participant to access automatic validation after submission.
- Allow the participant to access achieved points after the assessment period.
The participant can then access as per the list above:
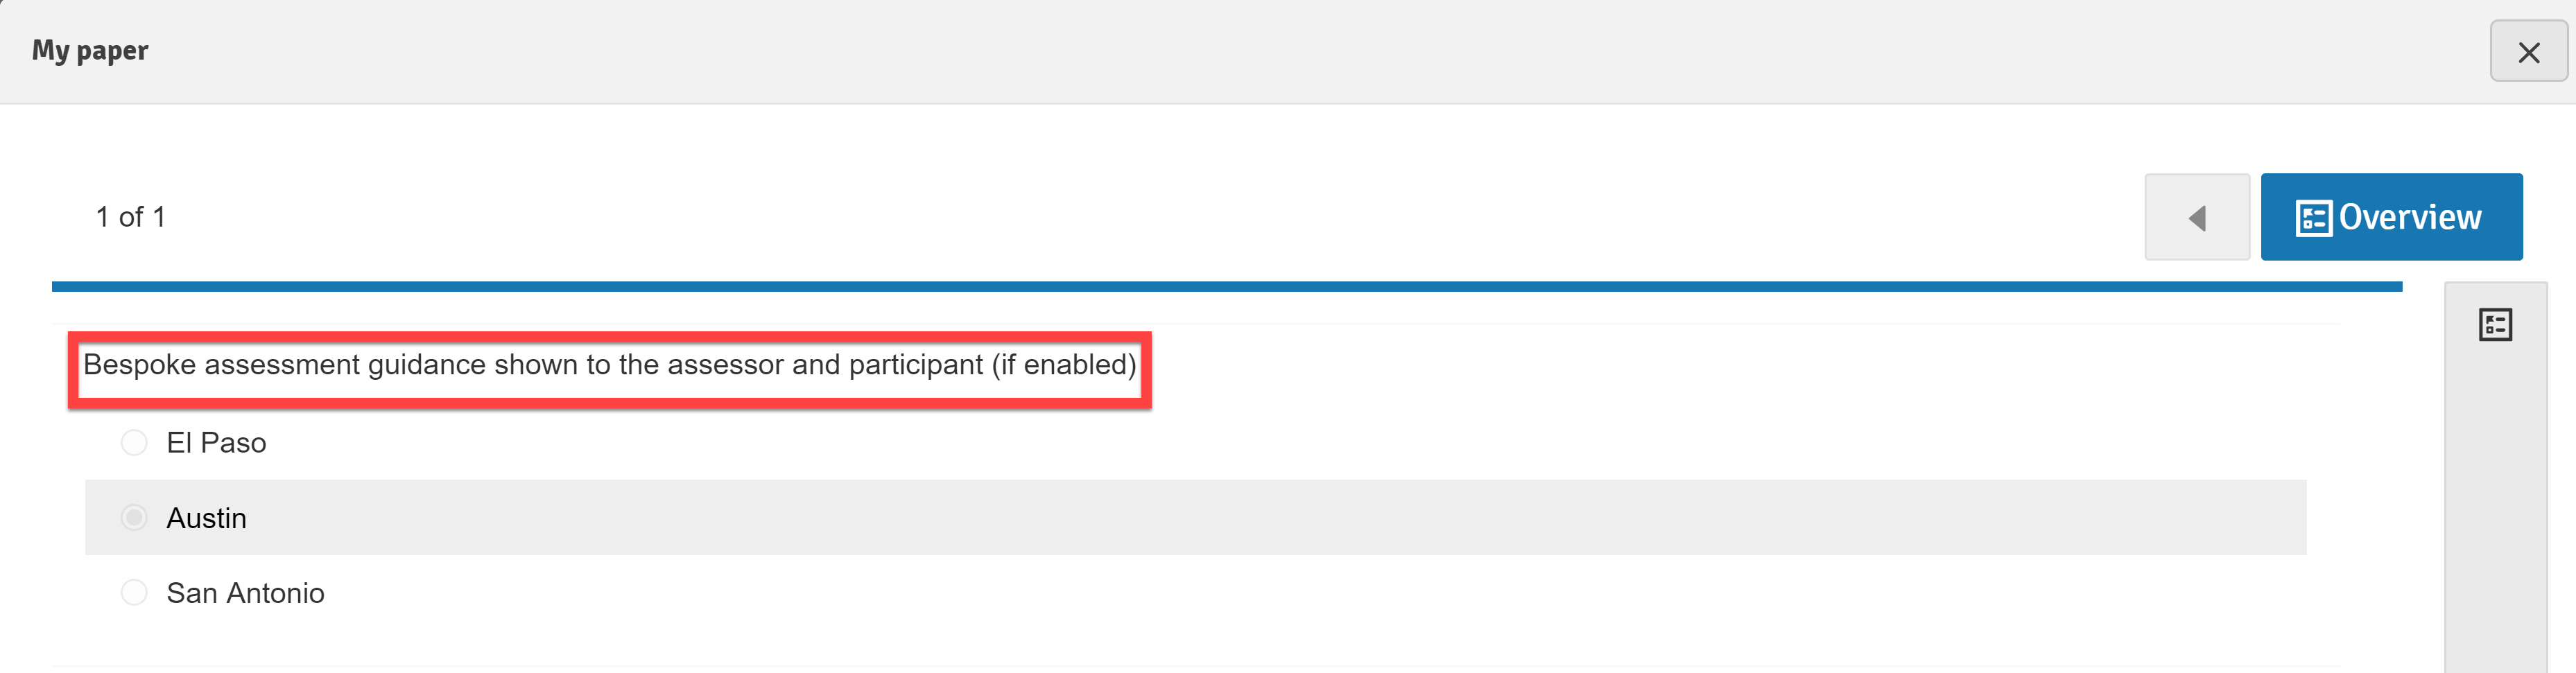
Submitted Paper
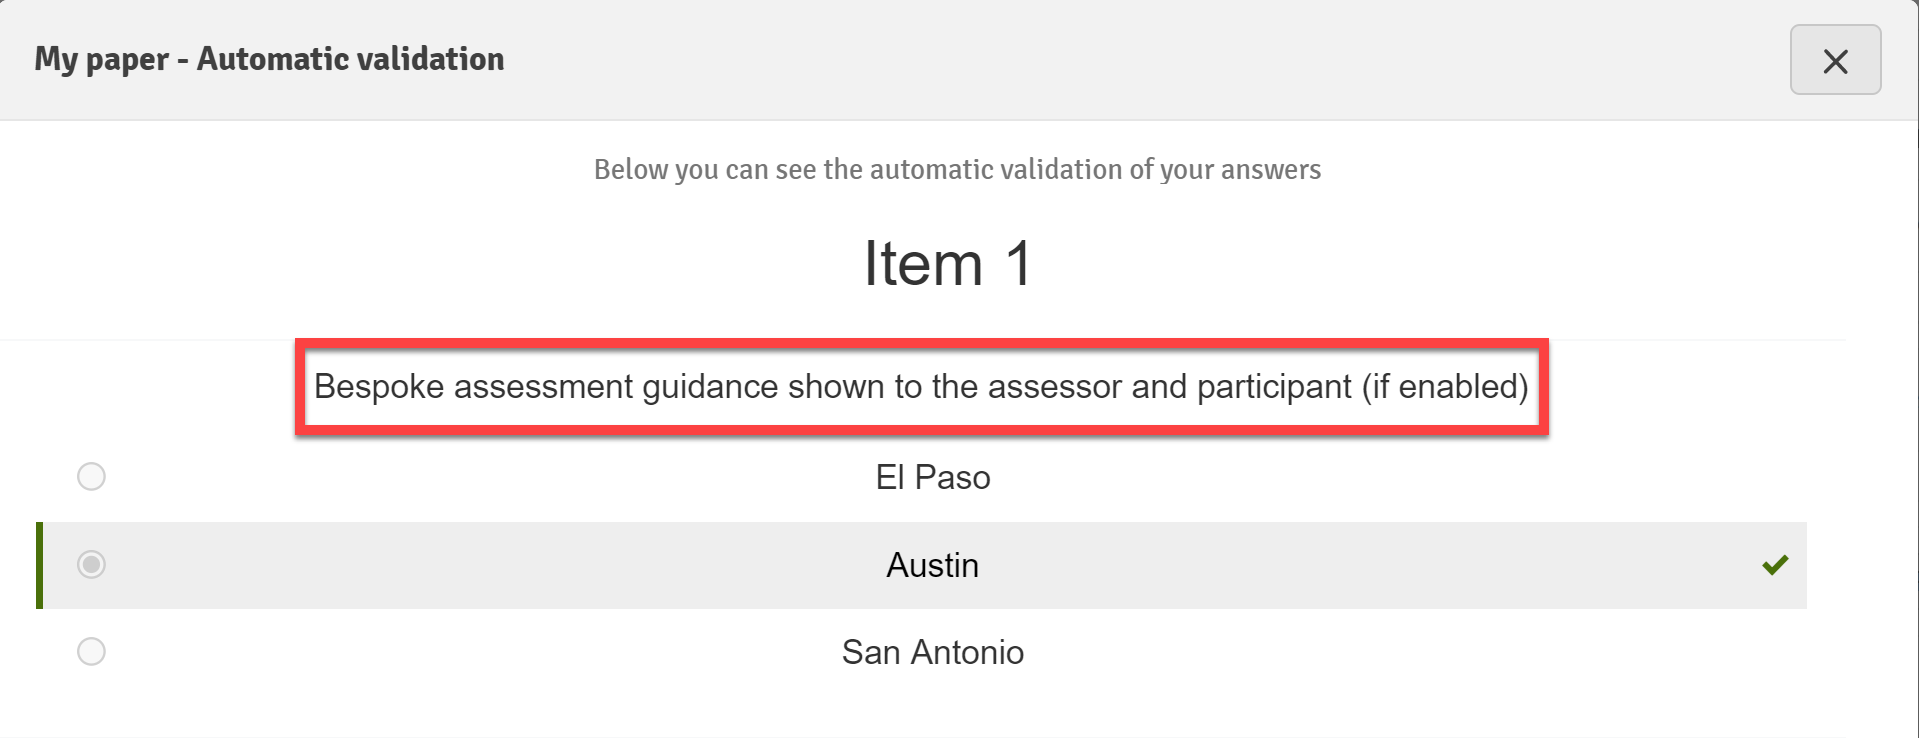
Automatic Validation
Feedback/Points After Assessment
Keypad
This information only applies to Maths questions:
- Style : It is possible to select different keyboard styles or no keyboard at all.
- Show hints: Enable or disable hints on the keypad, such as keyboard shortcuts and symbol group titles that are shown on the top left corner of the keypad when hovering over a symbol group key.
- Enable image capture : When enabled, participants can convert a photo of handwritten math into an on-screen editable response. The participant must have a camera connected to use this feature. Participants can submit their responses via the numeric keypad using the "camera" icon in the top right hand corner.
Once an image is captured and processed, it can then be edited as if it had been entered using the keyboard or alternate inputs. The response can be updated at anytime before being submitted.
- Enable horizontal keyboard: Changes the keypad layout to a rectangular, 2 row, keypad. You can then customize this keypad by selecting a button and either replacing it with another symbol or leaving it empty.
- Number pad: Customize the number pad in this section. Select a button to either change the order of the buttons or remove some buttons.
- Symbols: Select what symbol groups will be shown to the participant, or create custom symbol groups.
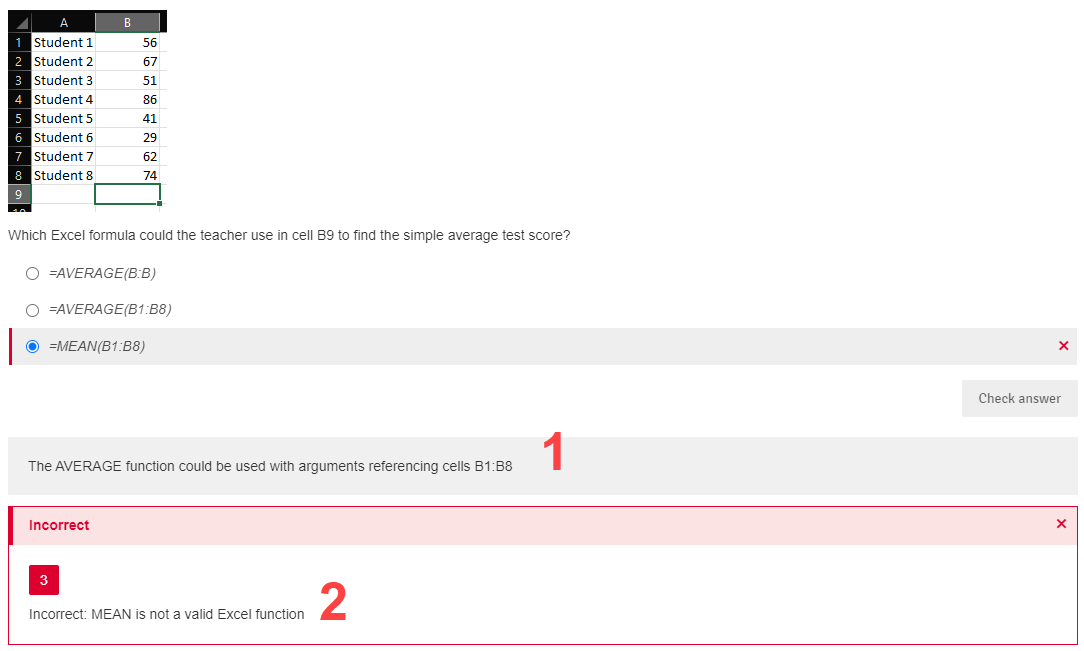
Distractor Rationale
Add individual answer option comments to enhance and personalise feedback provided to students. For further information on the idea behind rationale please see the article here.
To create distractor rationale, navigate to the Extras section in the question editor.
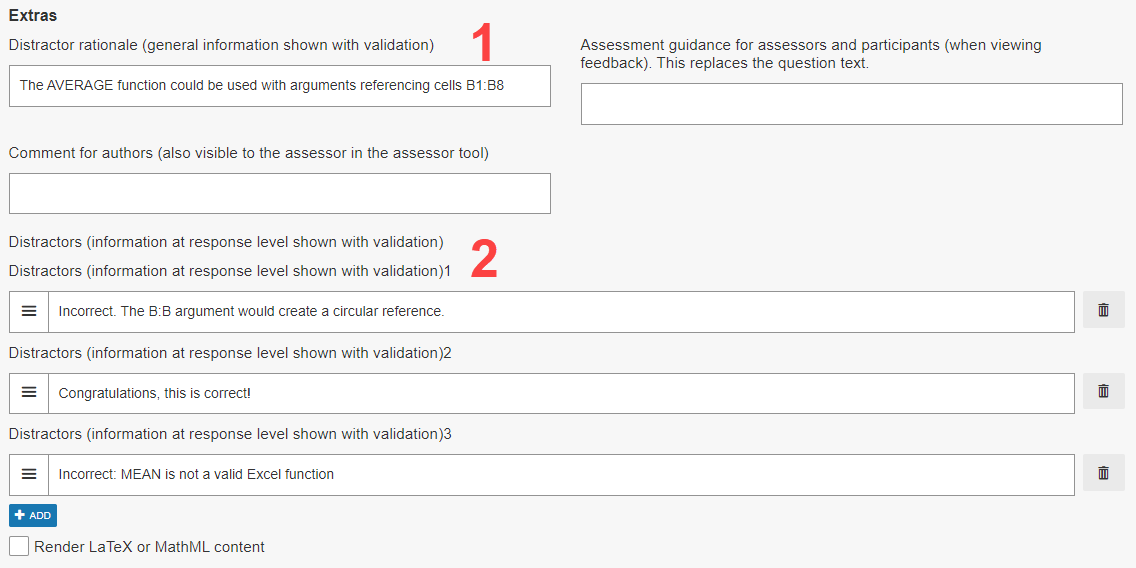
- Question-level feedback. Applies to the question as a whole (shown from a test-taker perspective labelled "1" in the image below).
- Individual answer option rationale. Use the add button to create a new field for each individual answer option. Fields are related to the answer options in the same order they are displayed in the question editor (e.g. Distractor field 1 = answer option 1, distractor field 2 = answer option 2). Shown from a test-take perspective labelled "2" in the image below.
Where the distractor rationale feature is used in fill-in-the-blank style questions, the distractor fields are related to the answer fields rather than the answer options.