Marking and grading in WISEflow involves a two-part process. Firstly, providing comments, feedback and establishing any scores and then secondly reviewing and submitting the final grades. The first part of the process is carried out inside the marking tool and this may look slightly different depending on which flow type is in use. Those similarities and differences are detailed in this article.
For details on the second part of the process (submitting final grading outcomes) please see the corresponding article on using the marking overview tool.
In this article:
- Accessing Submissions
- The Marking Tool Layout
- Moving Between Submissions
- Working with Group Submissions
- The Marking Archive
Accessing Submissions
The Marking Tool Layout
FLOWassign/FLOWlock
- Close the marking tool
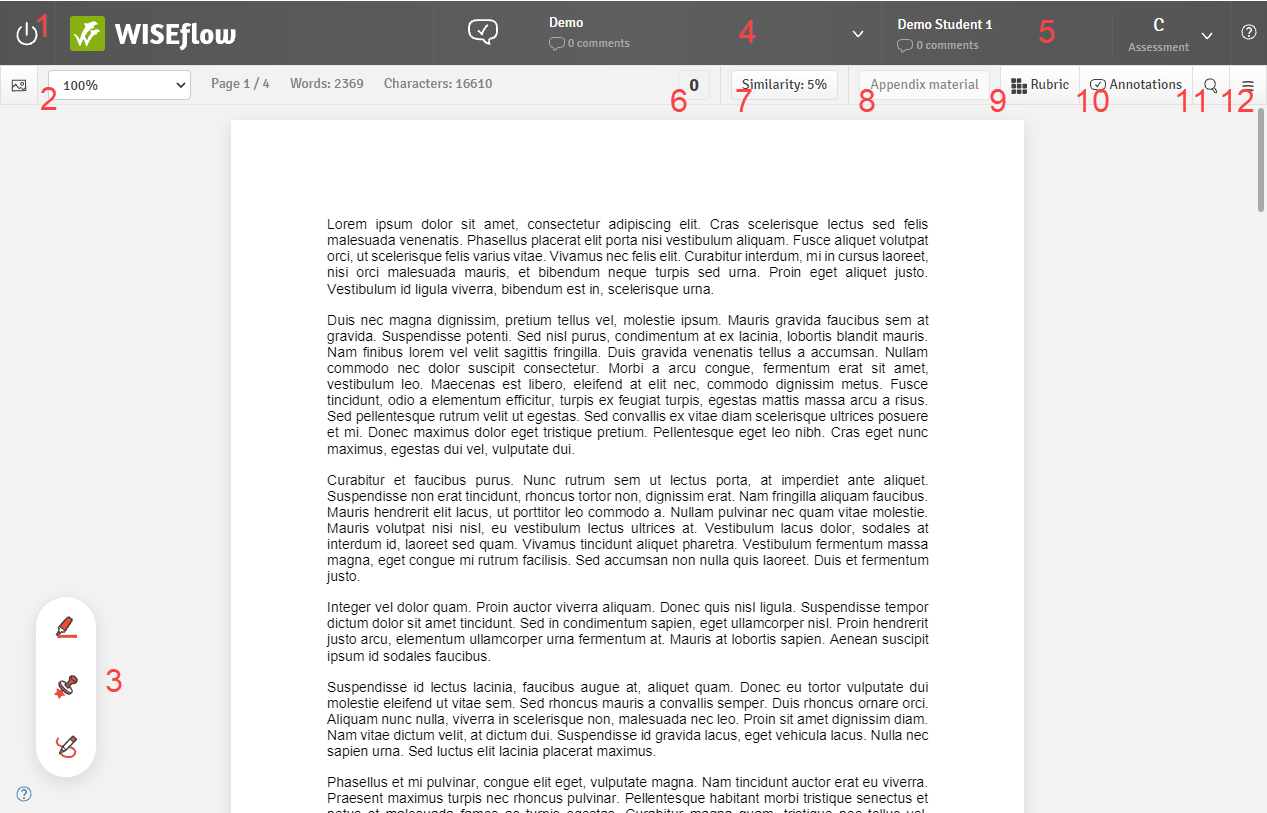
- Submission overview tools as well as page, word and character count. Words and character count includes any introduction or table of content but not any attached appendix material. It is possible to highlight certain areas of the text to get a word and character count for this specific area.
- Annotation tools
- Flow menu (view flow information, provide cohort feedback or switch between submissions)
-
Participant menu (view cover sheet, provide paper-level comments, access shared summary, enter final grade)
When a manager has enabled early release of feedback on a flow, it is possible for you to release any shared annotations, comments and rubrics instantly to individual participants.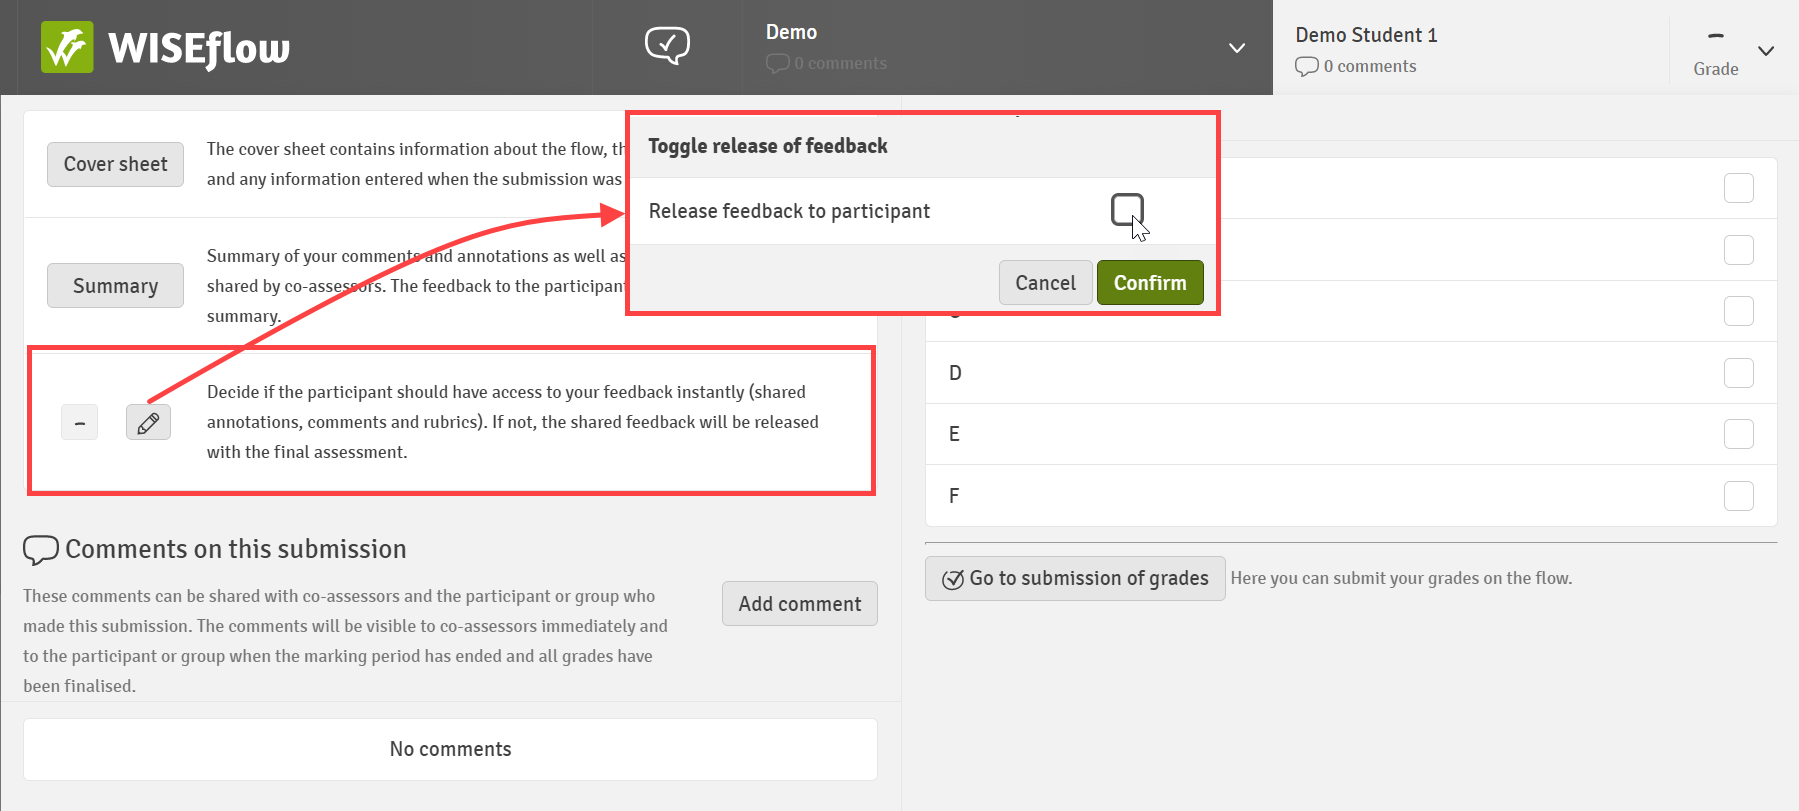
- Tally if using marks with annotations
- Access similarity report
- Open appendix material
- Open rubric
- View annotations
- Search the submission
- Export submission with overlaid annotations
The word count in the marking tool can appear less precise than in other tools like Word, as PDFs do not have a built in function to count characters and words.
The video below gives a short introduction to using the tools available for working with written assessments:
FLOWmulti
Submissions to a FLOWmulti will be presented in the marking tool as shown below:
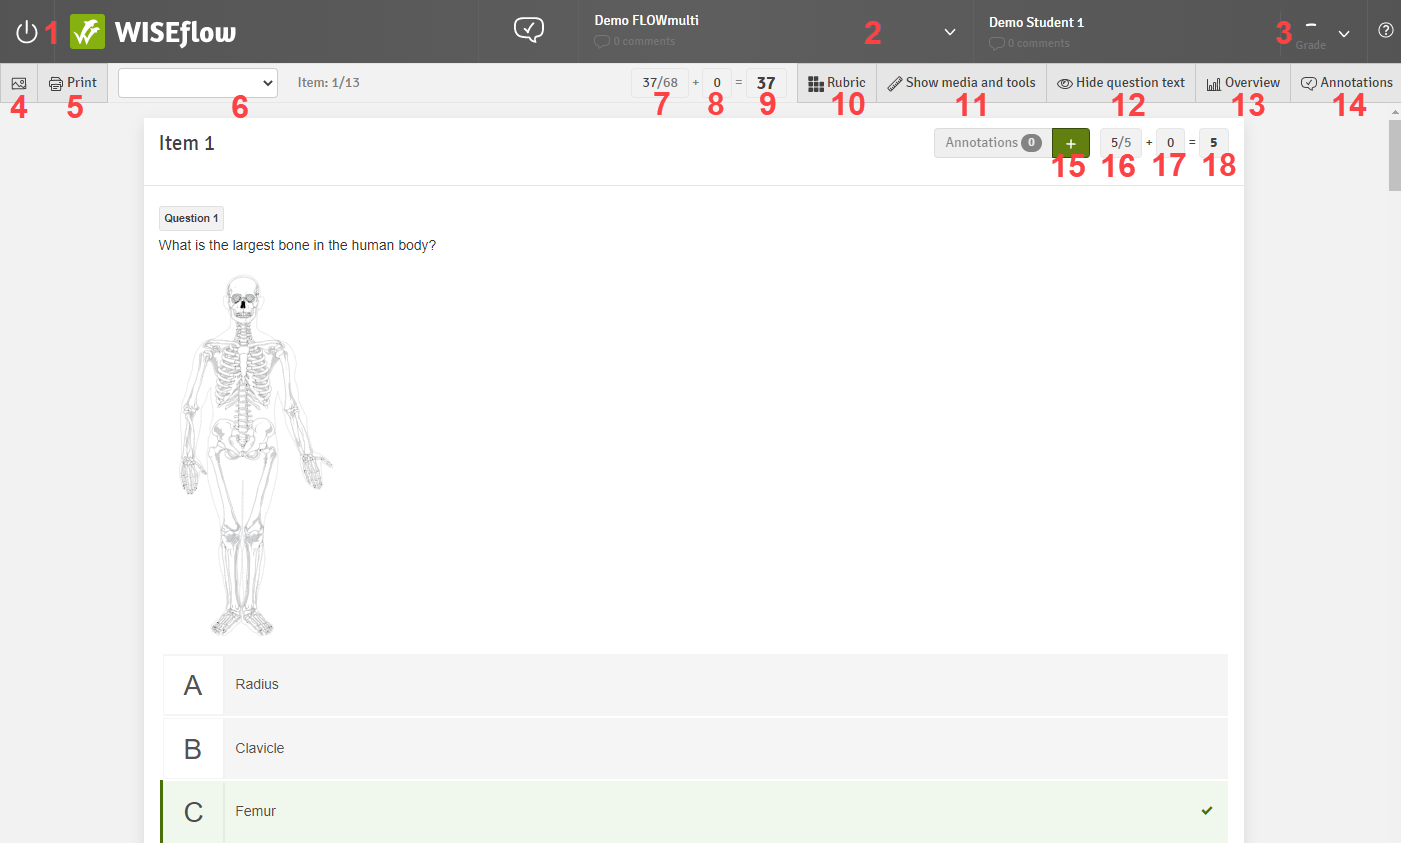
- Close the marking tool
- Flow menu (view flow information, provide cohort feedback or switch between submissions)
-
Participant menu (provide paper-level comments, access shared summary, enter final grade)
When a manager has enabled early release of feedback on a flow, it is possible for you to release any shared annotations, comments and rubrics instantly to individual participants.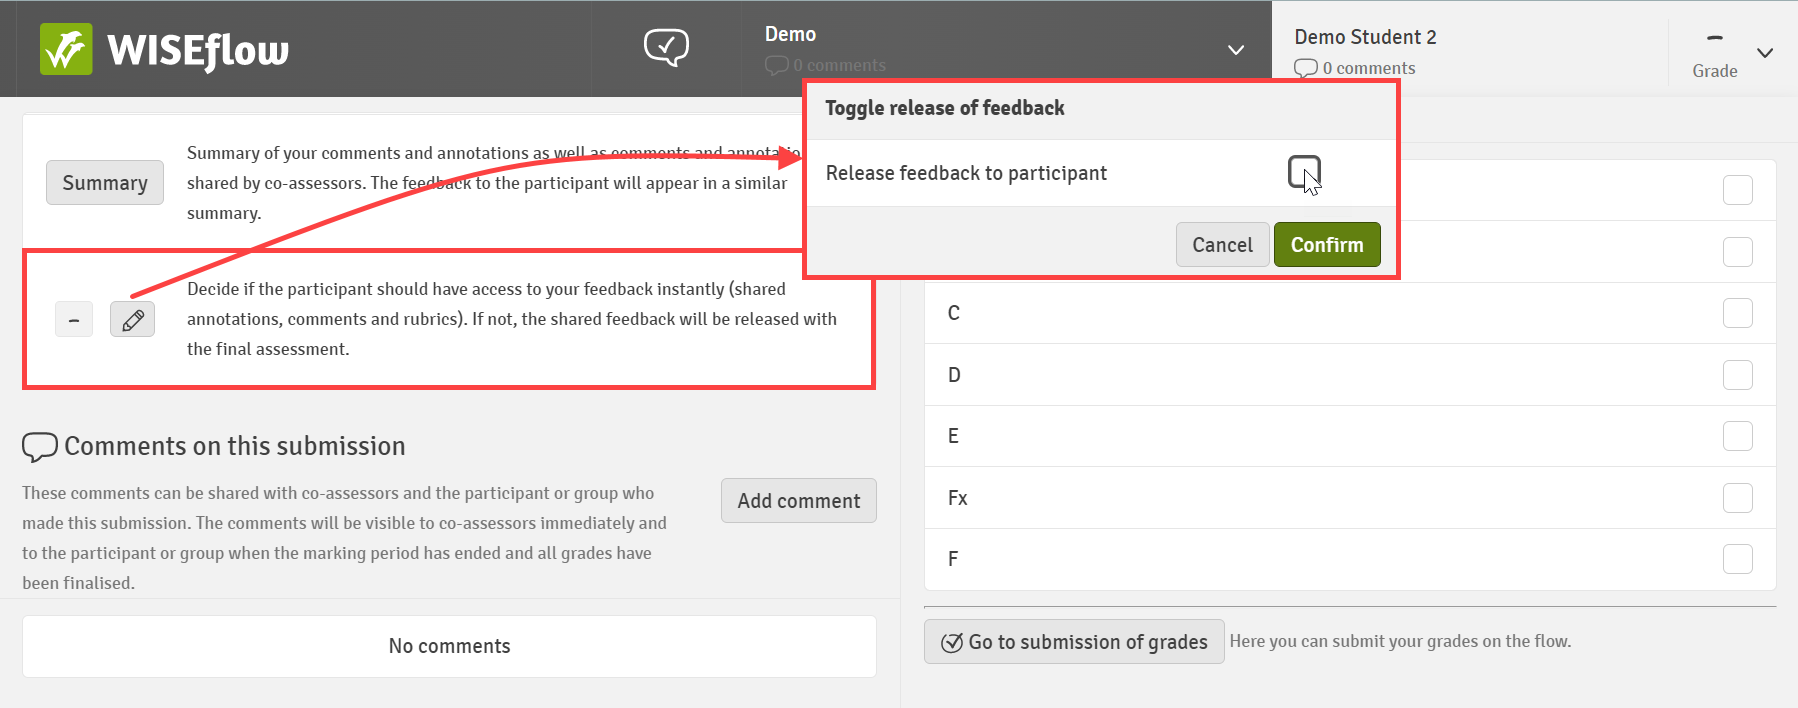
- Jump to individual items
- Generate a printout of the submission.
- Adjust the zoom level
- Total marks achieved by automatic scoring
- Total marks added by manual scoring
- Total marks tally
- Display rubric for the assessment process (not available for item-based marking)
- Show any media or tools that have been attached to an item/the assignment
- Hide the question text for a better overview of the answers
- Statistical overview of the submission
- View annotation summary
- Add annotations to the item
- Automatic score for the item
- Manual score for the item
- Total item score
The video below gives a short introduction to using the tools available for working with FLOWmulti assessments:
FLOWhandin
The marking tool in FLOWhandin works in a different way to some of the other flow types. Because FLOWhandin is designed to support the submission of alternative file types beyond the traditional essay format, it means that the contents of those files are not rendered directly in the system; rather they are made available to be downloaded for offline access.
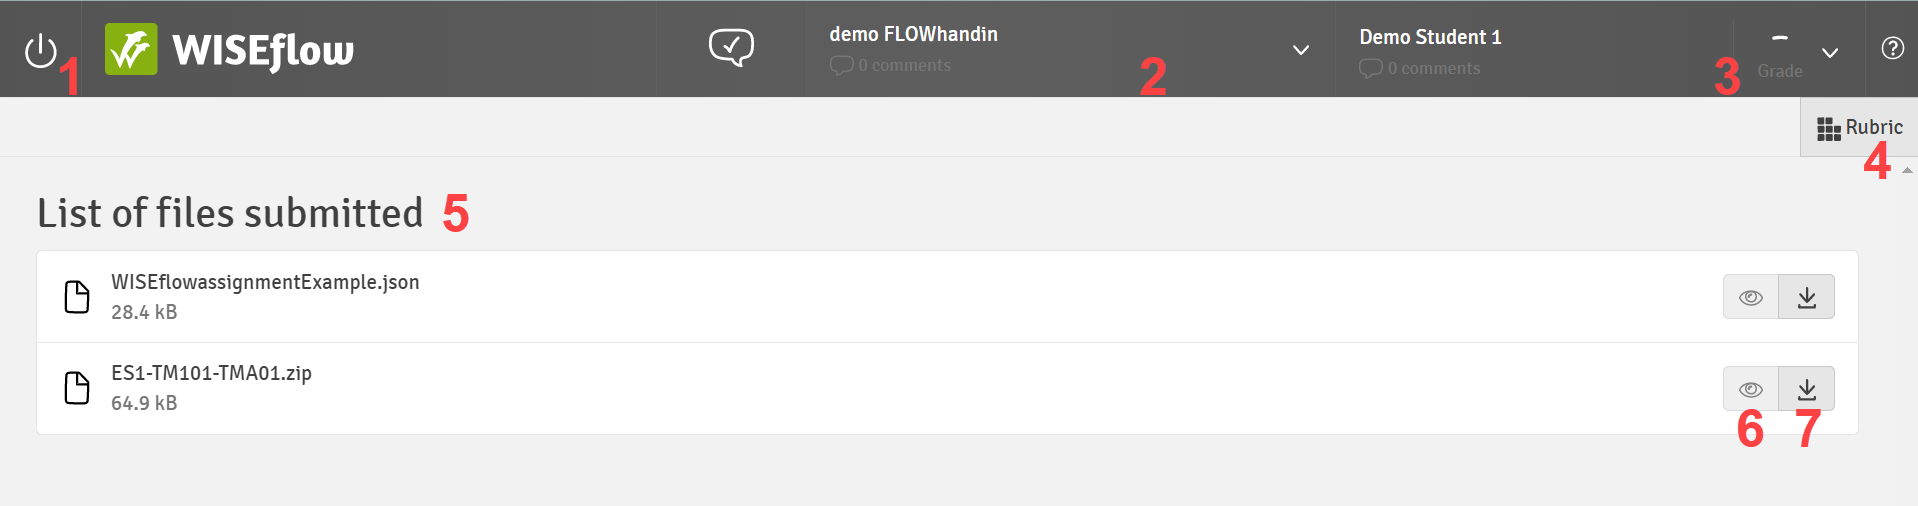
- Close the marking tool
- Flow menu (view flow information, provide cohort feedback or switch between submissions)
-
Participant menu (view cover sheet, provide paper-level comments, access shared summary, enter final grade)
When a manager has enabled early release of feedback on a flow, it is possible for you to release any shared annotations, comments and rubrics instantly to individual participants. - Open rubric
- List of submitted files
- Preview submitted file (only possible on a limited number of file types (e.g. pdf, jpeg, mp4)
- Download submitted file
FLOWoral/FLOWattend
As the marking tool for FLOWattend works in the same way as the examination tool for FLOWoral, please refer to The Examination Tool below on how to use the marking tool for FLOWattend.
Flow Page Overview for FLOWoral
FLOWoral is designed to support scheduled assessment activities where the assessor interacts with the candidate or observes them completing an activity or performing a particular skill. As such candidates are not required to submit artefacts to WISEflow, rather they are scored based on the assessor's live observation. It also means that the scoring usually takes place in a real-time context as the assessor observes the candidate completing their assessment. To support this format the WISEflow interface differs from some from some of the other flow types.
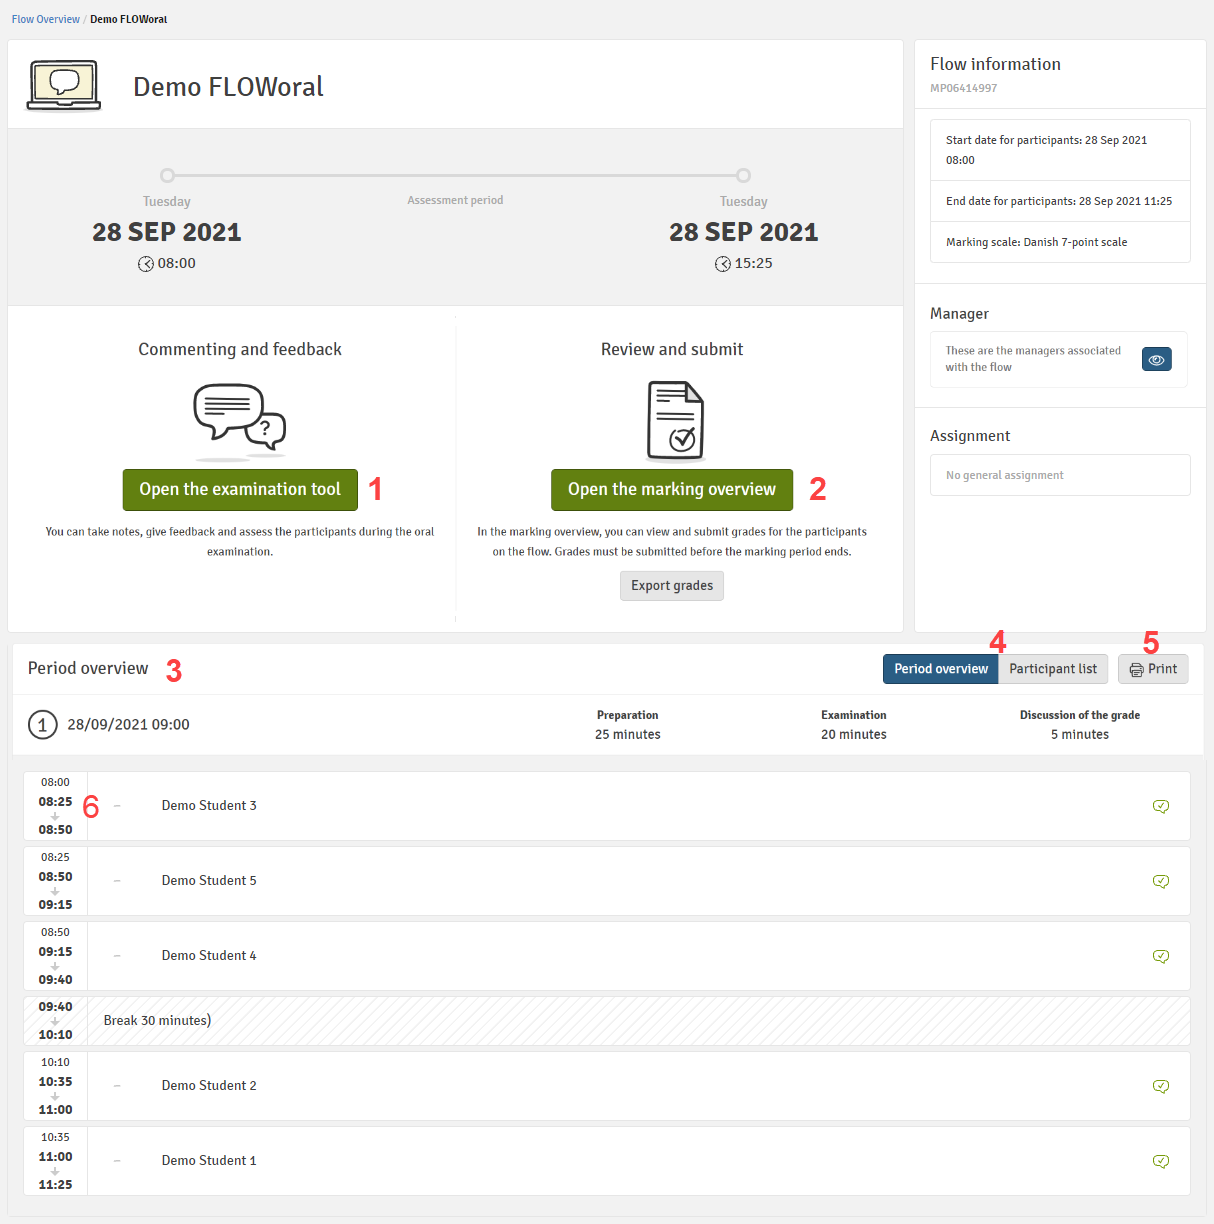
- Open the examination tool (access scoring and grading tools)
- Grade overview (where final grades will eventually be submitted)
- Period overview (details the candidates to which you have been assigned as an assessor and in which order they are due to appear)
- Toggle between candidate list and exam timetable views (alternative view shown below)
- Print summary
- The different times indicate the start time for preparation, the start time of the oral examination and the end time of the examination. If time has been allocated for the discussion of the grade, this will be reflected in the end time for an individual participant.
- Overview displayed as a candidate list
- Option to adjust periods (if enabled by the flow manager)
- Feedback sentiment analysis
- Details of any co-assessors
The Examination Tool
Although no submission will be present, the examination tool itself works in a very similar way to the general marking tool and many of the same tools for marking and feedback are provided.
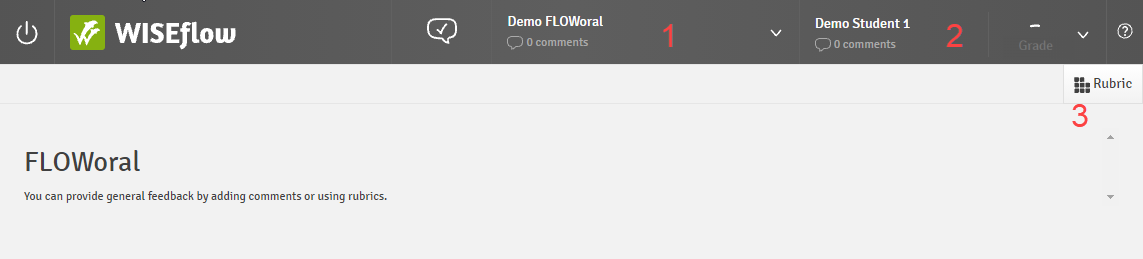
- Flow menu (view flow information, provide cohort feedback or switch between candidates)
-
Participant menu (provide comments, access shared summary, enter final grade)
When a manager has enabled early release of feedback on a flow, it is possible for you to release any shared annotations, comments and rubrics instantly to individual participants. - Access and complete rubrics
Moving Between Submissions
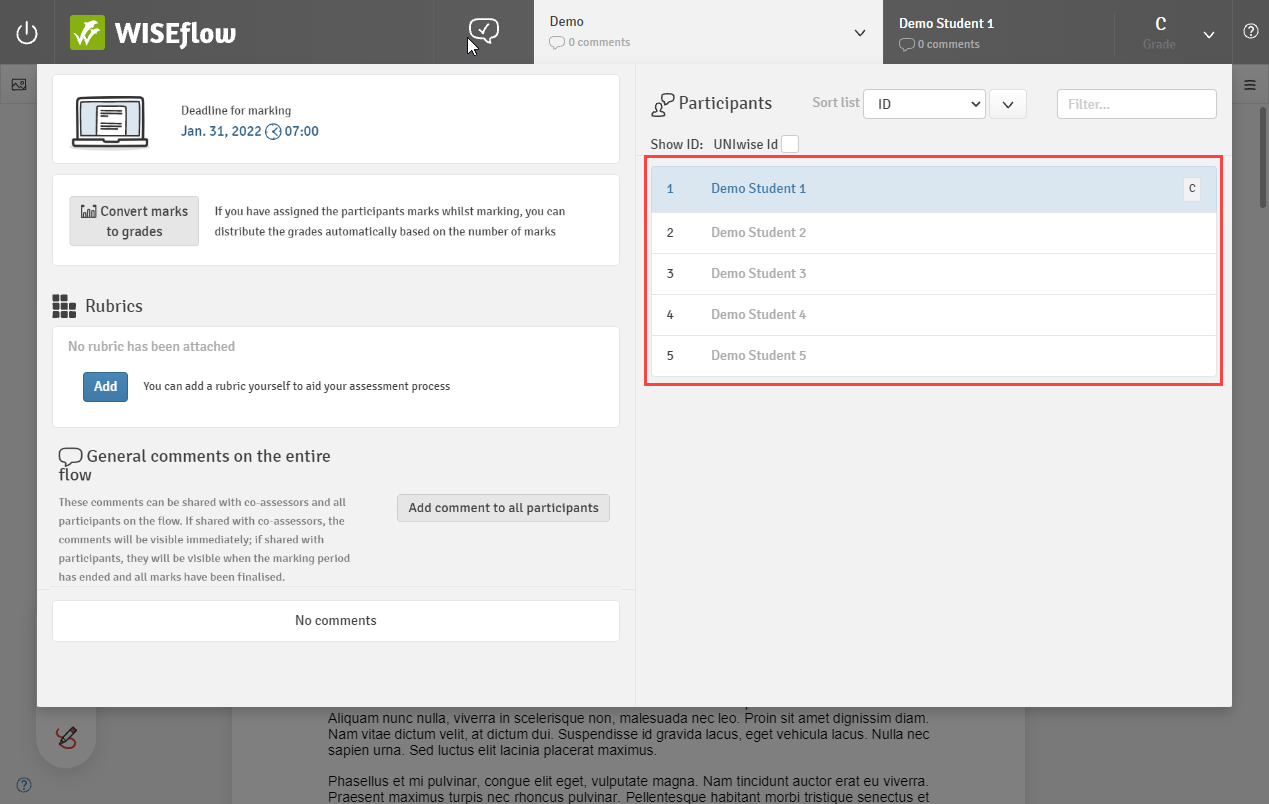
From the Flow Menu
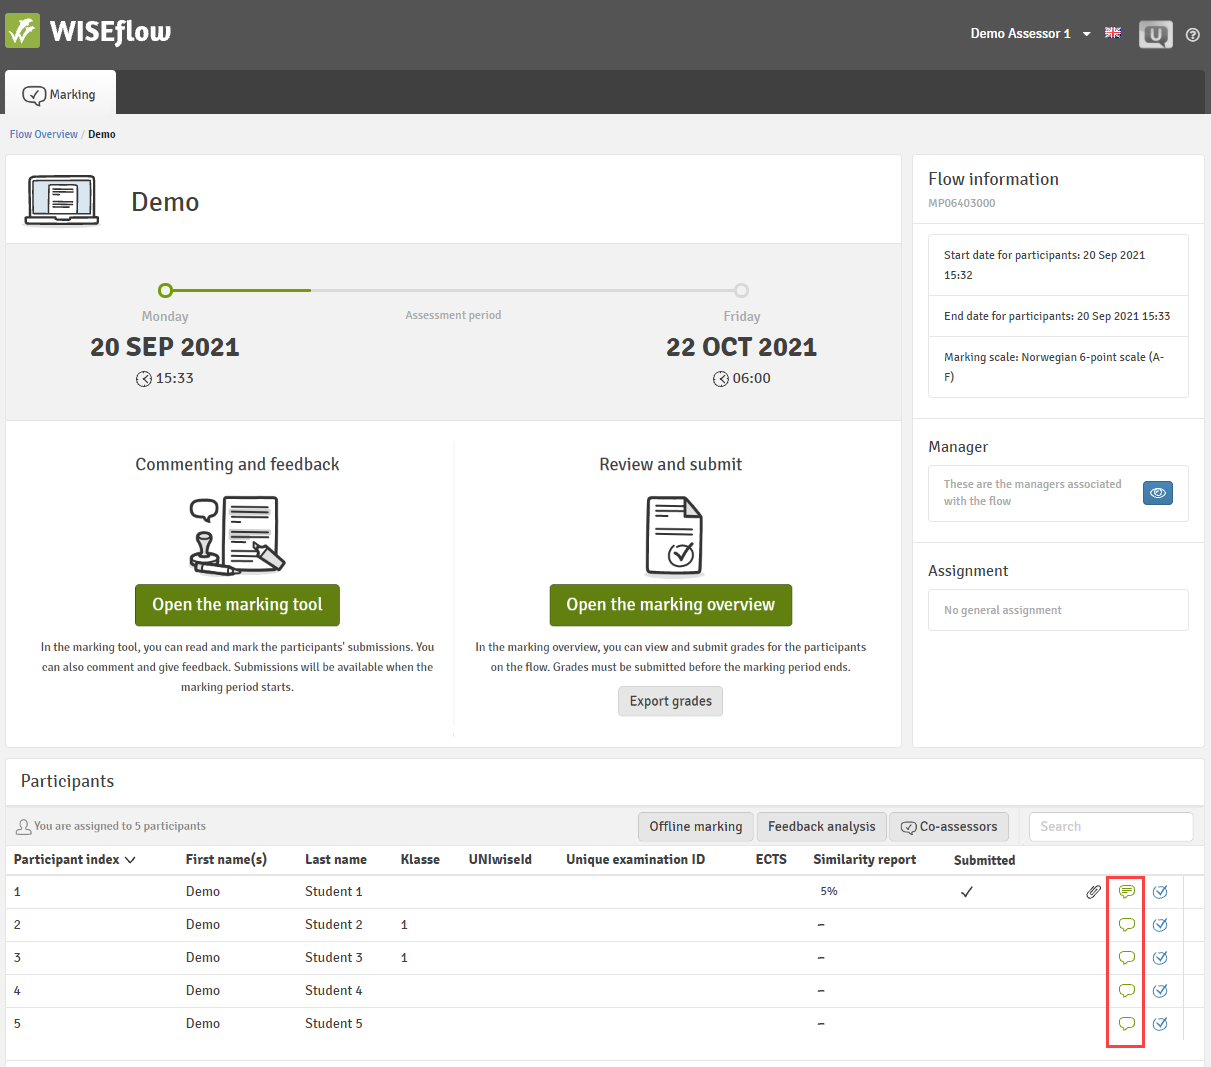
The flow menu displays all the participants to which you have been assigned as an assessor and provides a quick way to move between each submission from inside the marking tool.
From the Flow Landing Page
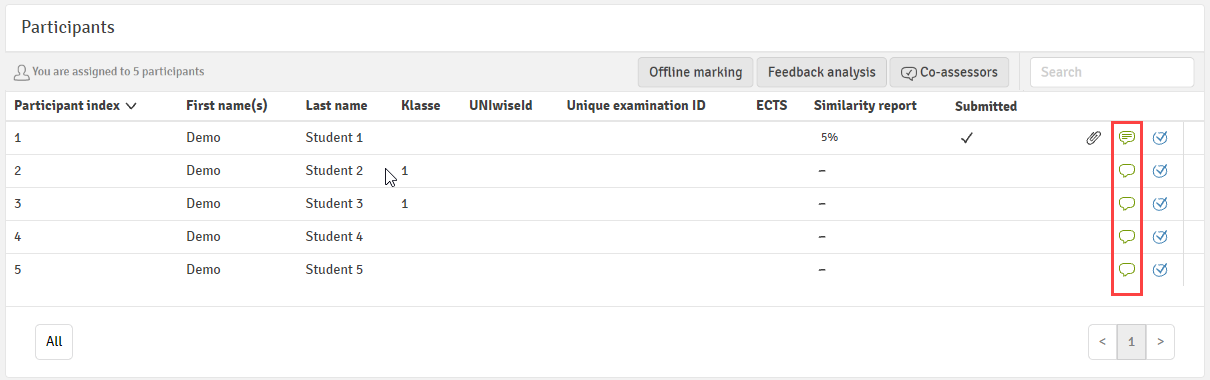
Closing the marking tool will take you back to the flow landing page from which you can also view a list of your assigned participants. Click the green speech bubble against any row to jump straight to the corresponding submission in the marking tool.
From the Item Arrow (FLOWmulti only)
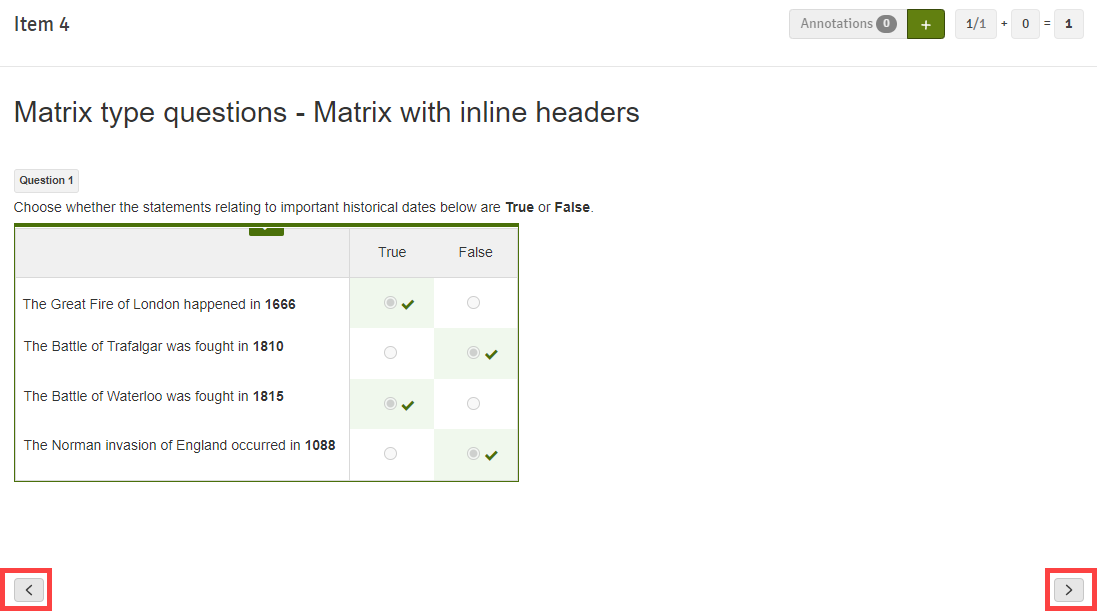
Click the forward or back arrows at the bottom of each FLOWmulti item to navigate to the same item of the test for the previous or next participant in the list.
Working With Group Submissions
- Group submission: Each group hands in one submission. Any of the group members can submit on behalf of the group.
- Individual submission: Participants are still arranged into groups, but each has to make their own individual submission.
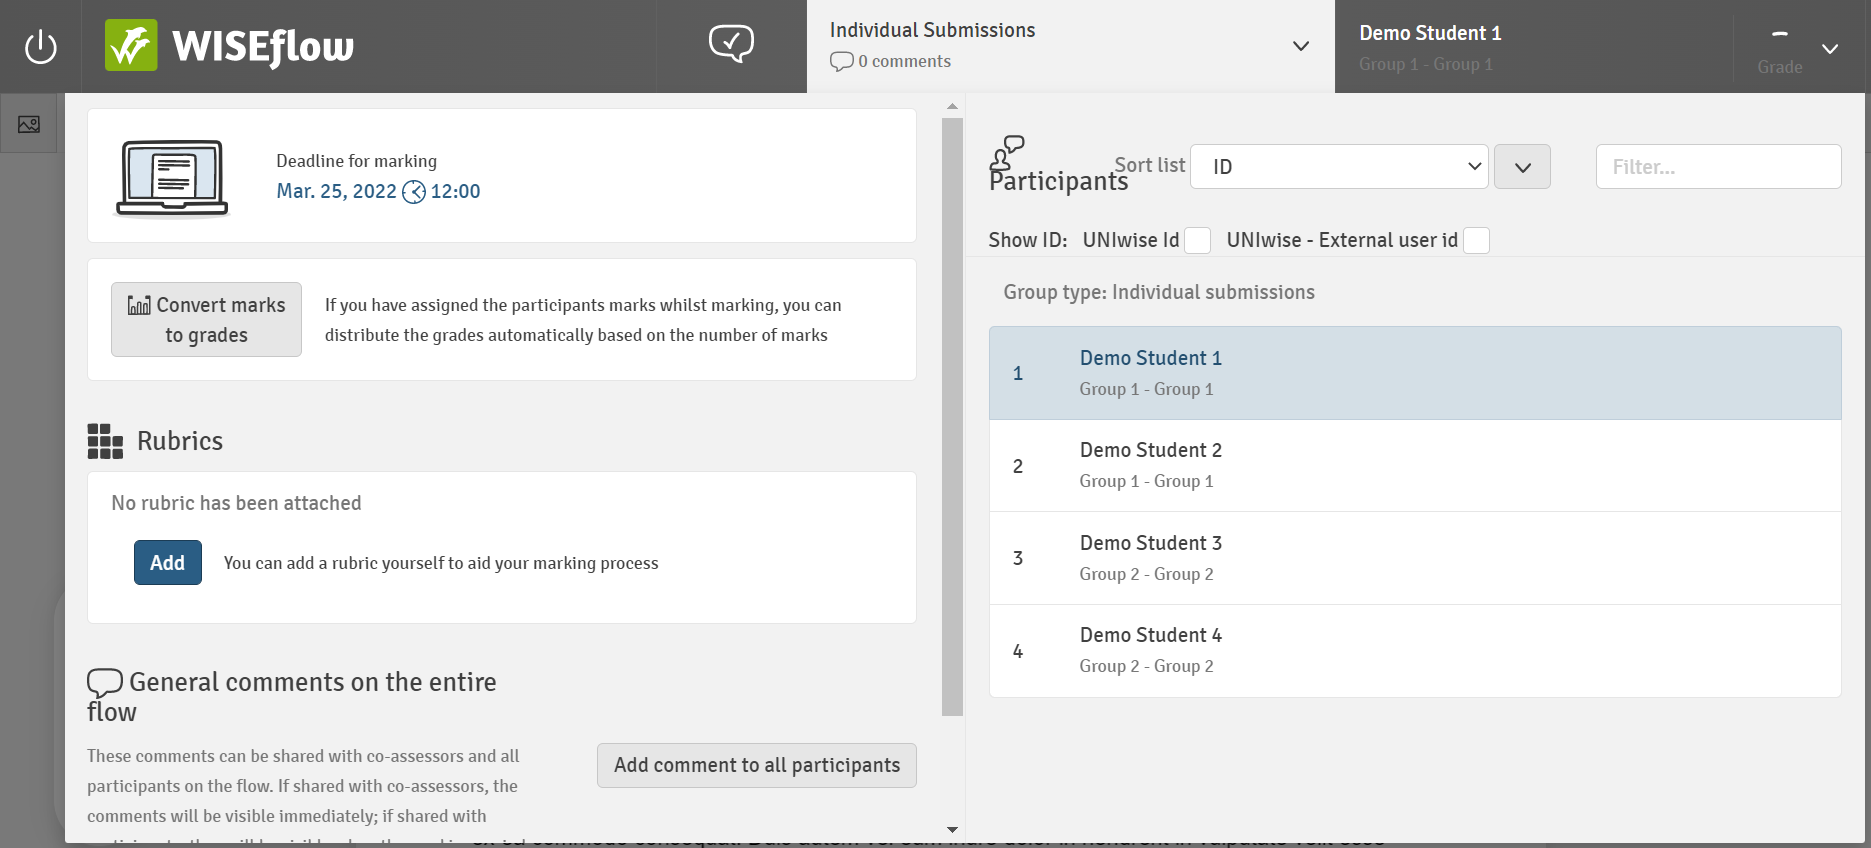
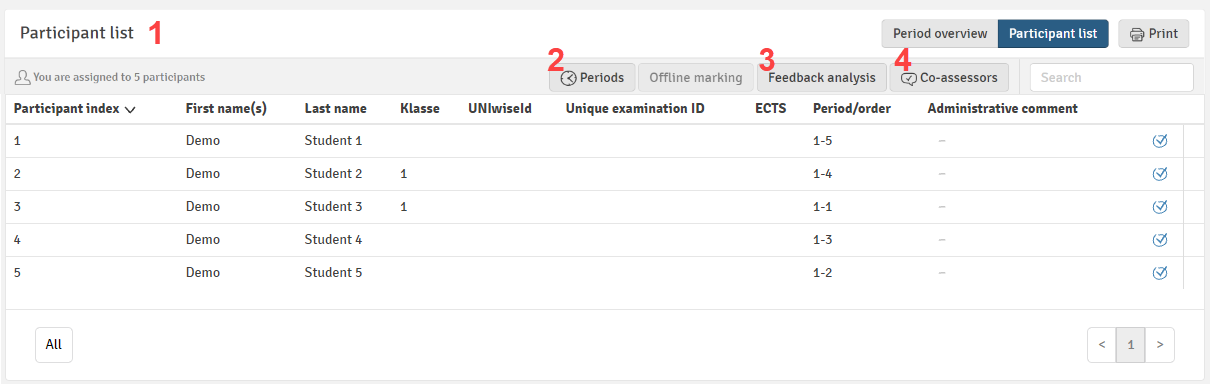
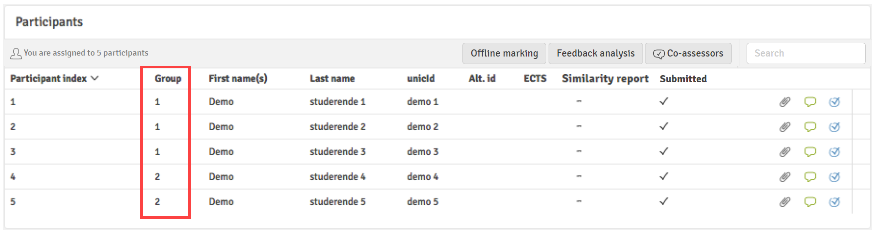
Group information is available to assessors via the participant list. Where groups have been enabled the flow page will display an additional column showing the group number (please note that the value in this list is a system-generated number and may not necessarily correspond with a group name if separate group name labels have been added).
Group Submissions
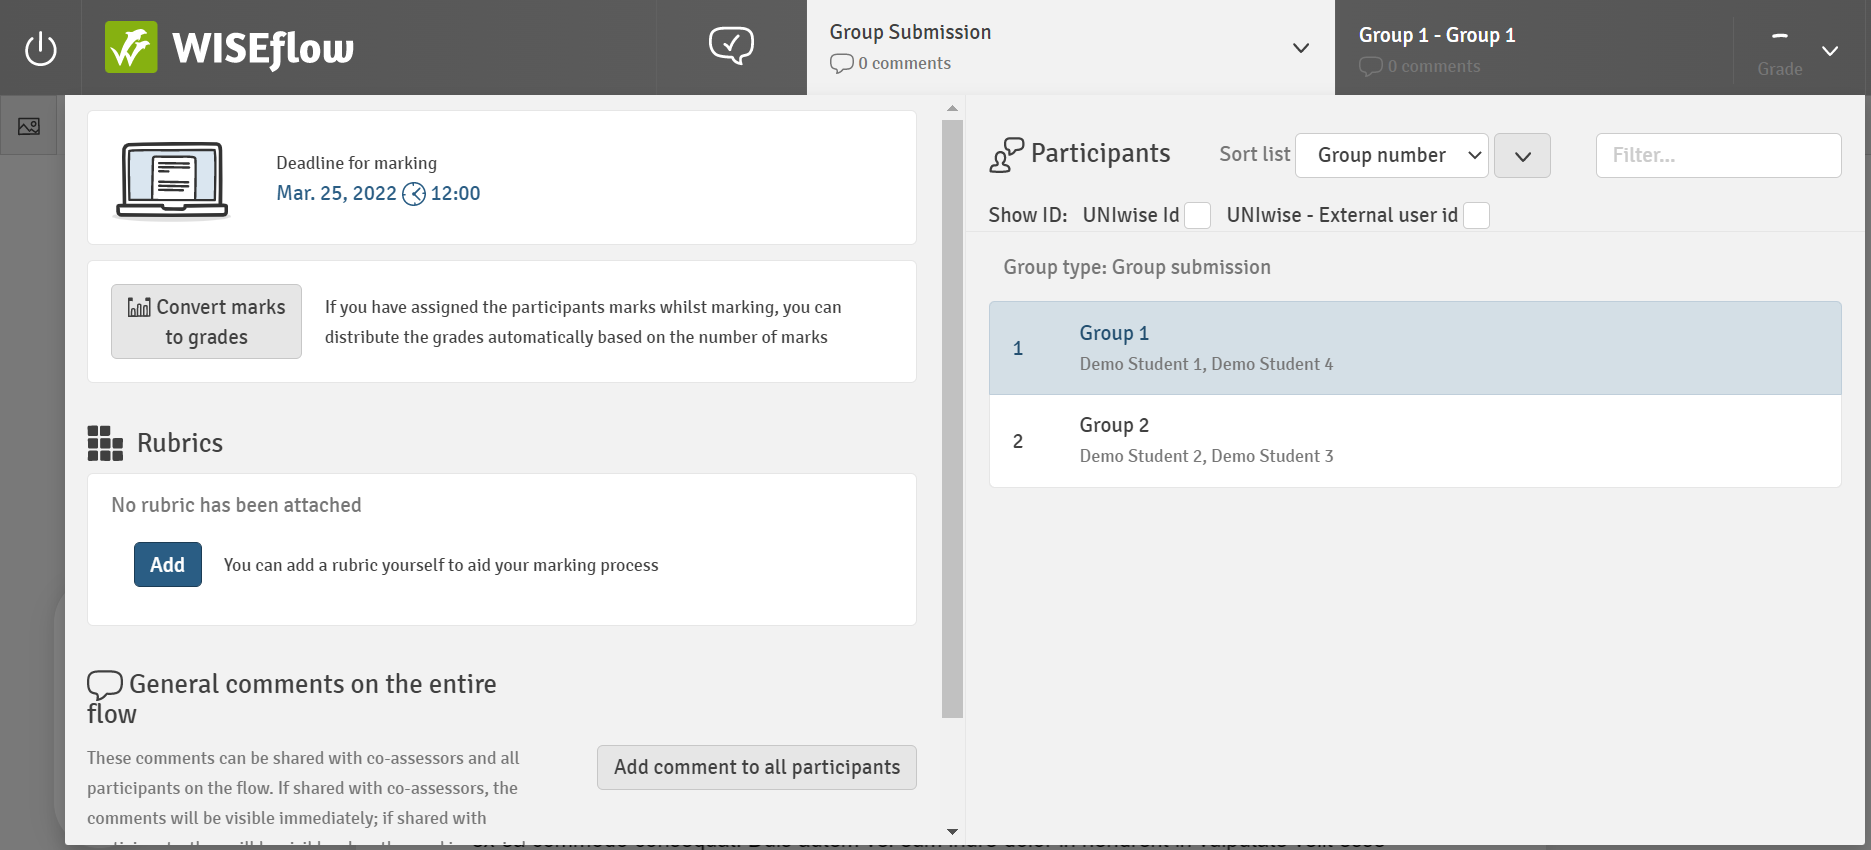
For group submissions, the flow menu in the marking tool will display a single entry for the group. Simply select the group submission and assess it in the normal way. Each individual participant will receive the same feedback you provide.
Individual Submissions
Individually submitted papers will appear as a list of individual participants but with group information also visible. These can be completed in the usual way where each participant receives the individual feedback you provide.